ownCloud Infinite Scale With OpenID Connect Authentication for Home Networks
- Home Automation, Networking & Self-Hosting
- Published Jan 10, 2023 Updated Jan 25, 2025
This article explains how to set up ownCloud Infinite Scale with OpenID Connect authentication to Authelia or authentik. This post is part of my series on home automation, networking & self-hosting that shows how to install, configure, and run a home server & network with dockerized or virtualized services.
Why ownCloud?
Motivation to Move Away From Tresorit
Before setting up ownCloud on my new home server, I used Tresorit for our family’s data. Tresorit is an end-to-end encrypted cloud-based file sync and share service. While I’m generally happy with Tresorit’s core functionality, there are multiple reasons to move away from it:
- Price: replace an expensive cloud service with a self-hosted application.
- Restore: Tresorit’s restore functionality for deleted files sucks.
- Setup: the installer doesn’t work well if the Windows user doesn’t have admin rights.
- Functionality: there haven’t been any significant new features in years (hint: ACLs).
ownCloud vs. Nextcloud
ownCloud and Nextcloud originally were one company before the 2016 fork that created Nextcloud. Since then, both companies have developed independent products that slowly diverged due to different focus areas.
Stability vs. Functionality
ownCloud seems to be more focused on stability and the core file-sharing functionality. Nextcloud, on the other hand, is trying to offer a jack-of-all-trades kind of product with conferencing, calendar, contacts, mail, office, and, of course, file sharing.
ownCloud Infinite Scale (oCIS)
Just in time for my project, ownCloud completed a complete rewrite of the entire product. The new ownCloud Infinite Scale (oCIS) replaced the dated PHP codebase that ownCloud shared with Nextcloud with a modern microservices architecture for higher speed and scalability. oCIS only needs a single container and doesn’t use a database. Metadata is stored in the filesystem instead.
Mobile Apps
Last, but not least, the ownCloud Android app is rated much better than Nextcloud’s.
Preparation
I’m assuming that you’ve set up Docker, the Caddy container, and either Authelia or authentik as described in the previous articles in this series.
ownCloud oCIS Installation in Docker Container
Directory Structure
This is what the directory structure will look like when we’re done:
rpool/
 └── encrypted/
     └── docker/
         └── ownCloud/
             ├── config/
             ├── data/
             ├── container-vars.env
             └── docker-compose.yml
We’re placing the configuration on the encrypted ZFS dataset (rpool/encrypted).
Create the directories and set their owners to user/group ID 1000, which are used by dockerized ownCloud (docs):
mkdir -p /rpool/encrypted/docker/ownCloud/config
mkdir -p /rpool/encrypted/docker/ownCloud/data
chown -Rfv 1000:1000 /rpool/encrypted/docker/ownCloud/config
chown -Rfv 1000:1000 /rpool/encrypted/docker/ownCloud/data
Docker Compose File
Create docker-compose.yml with the following content:
services:

  owncloud:
    container_name: owncloud
    hostname: owncloud
    image: owncloud/ocis:latest
    restart: unless-stopped
    networks:
      - caddy_caddynet
    entrypoint:
      - /bin/sh
    # Run ocis init to initialize a configuration file with random secrets.
    # It will fail on subsequent runs, because the config file already exists.
    # Therefore we ignore the error and then start the ocis server
    command: ["-c", "ocis init || true; ocis server"]
    expose:
      - 9200
    env_file:
      - container-vars.env
    volumes:
      - ./config:/etc/ocis
      - ./data:/var/lib/ocis

networks:
  caddy_caddynet:
    external: true
container-vars.env File
Create container-vars.env with the following content:
DEMO_USERS=false                                  # do not create demo users
PROXY_TLS=false                                   # use the HTTP server instead of the HTTPS server.
OCIS_INSECURE=true                                # generate self-signed certificates
OCIS_URL=https://owncloud.home.yourdomain.com     # replace with your domain
PROXY_HTTP_ADDR=0.0.0.0:9200                      # listen on all available interfaces

OCIS_LOG_LEVEL=info
OCIS_LOG_COLOR=true
OCIS_LOG_PRETTY=true
Start the Container
Navigate into the directory with docker-compose.yml and run:
docker compose up -d
Print the container’s output by running docker compose logs --tail 30 --timestamps. You should see something similar to the following:
owncloud  | 2022-12-18T22:39:03.042863506Z
owncloud  | 2022-12-18T22:39:03.042886195Z =========================================
owncloud  | 2022-12-18T22:39:03.042889056Z  generated OCIS Config
owncloud  | 2022-12-18T22:39:03.042891413Z =========================================
owncloud  | 2022-12-18T22:39:03.042893508Z  configpath : /etc/ocis/ocis.yaml
owncloud  | 2022-12-18T22:39:03.042895498Z  user       : admin
owncloud  | 2022-12-18T22:39:03.042899121Z  password   : 1234123412341234123412412341
owncloud  | 2022-12-18T22:39:03.042901222Z
Store the admin user’s password safely.
Let’s Encrypt Certificate via Caddy
Caddyfile
Add the following to Caddyfile (details):
owncloud.{$MY_DOMAIN} {
	reverse_proxy owncloud:9200
	tls {
		dns cloudflare {env.CLOUDFLARE_API_TOKEN}
	}
}
DNS A Record
Add the following A record to your DNS domain:
owncloud.home.yourdomain.com 192.168.0.4 # replace with your Docker host's IP address
Try to resolve the name on a machine in your network (e.g., nslookup owncloud.home.yourdomain.com). If that fails, you might need to work around DNS rebind protection in your router.
Reload Caddy’s Configuration
Instruct Caddy to reload its configuration by running:
docker exec -w /etc/caddy caddy caddy reload
You should now be able to log into ownCloud’s web interface at https://owncloud.home.yourdomain.com with the user admin and the password displayed on the console after the first start of the ownCloud container (see above).
Create Your ownCloud User Account
While ownCloud supports single sign-on via OpenID Connect, it currently doesn’t seem to support auto-provisioning via the environment variable PROXY_AUTOPROVISION_ACCOUNTS in the scenario presented here. That might not be a bad thing since I don’t want every user defined in Authelia to automatically have access to ownCloud, too.
We, therefore, need to create users manually. Navigate to Application switcher > User management > Users and create a new user for yourself. Assign a complex password - just in case. You shouldn’t need it. When the user is created, edit it and assign the Admin role.
SSO via Authelia: ownCloud OpenID Connect Authentication
This section describes how to set up single sign-on to ownCloud via OpenID Connect authentication to Authelia. If you prefer to use authentik, you can skip this section and move on to the alternative configuration below.
Authelia: Configure OpenID Connect IdP
Secrets
Add the following to Authelia’s container-vars.env file (details):
AUTHELIA_IDENTITY_PROVIDERS_OIDC_HMAC_SECRET_FILE=/secrets/IDENTITY_PROVIDERS_OIDC_HMAC_SECRET

# Enable the template filter to reference file secrets in the configuration
X_AUTHELIA_CONFIG_FILTERS=template
Generate random alphanumeric strings and store them in individual files in the secrets directory:
cd /rpool/encrypted/docker/authelia/
tr -cd '[:alnum:]' < /dev/urandom | fold -w "64" | head -n 1 > ./secrets/IDENTITY_PROVIDERS_OIDC_HMAC_SECRET
Generate an RSA keypair:
cd /rpool/encrypted/docker/authelia/secrets/
openssl genrsa -out IDENTITY_PROVIDERS_OIDC_JWKS 4096
YAML Configuration File
Add the following to Authelia’s configuration file config/configuration.yml (details):
identity_providers:
  oidc:
    # Extend the access and refresh token lifespan from the default 30m to work around ownCloud client re-authentication prompts every few hours.
    # It should be possible to remove this once Authelia supports dynamic client registration (DCR).
    # Note: ownCloud's built-in IDP uses a value of 30d.
    lifespans:
      access_token: 30d
      refresh_token: 30d
    jwks:
      - key: {{ secret "/secrets/IDENTITY_PROVIDERS_OIDC_JWKS" | mindent 10 "|" | msquote }}
    cors:
      endpoints:
        - authorization
        - token
        - revocation
        - introspection
        - userinfo
    clients:
      ## Source: https://doc.owncloud.com/ocis/next/deployment/services/s-list/idp.html
      - client_id: ownCloud-web
        client_name: ownCloud web client
        public: true
        redirect_uris:
          - https://owncloud.home.yourdomain.com/
          - https://owncloud.home.yourdomain.com/oidc-callback.html
          - https://owncloud.home.yourdomain.com/oidc-silent-redirect.html
      - client_id: xdXOt13JKxym1B1QcEncf2XDkLAexMBFwiT9j6EfhhHFJhs2KM9jbjTmf8JBXE69
        client_name: ownCloud desktop client
        # Well-known secret as plaintext
        # client_secret: 'UBntmLjC2yYCeHwsyj73Uwo9TAaecAetRwMw0xYcvNL9yRdLSUi0hUAHfvCHFeFh'
        # Well-known secret hashed
        client_secret: '$pbkdf2-sha512$310000$.z/6sV7qQSx1.5zPetVVCQ$JIEPOTFTSokJjDNVhlMLq7tYnHd/E17wSHW.GYXQA0QjfTPqTosyRr7qSHxSiPmXympfTbGF6FmnnX9on.uQng'
        scopes:
          - openid
          - groups
          - profile
          - email
          - offline_access
        redirect_uris:
          - http://127.0.0.1
          - http://localhost
        allow_multiple_auth_methods: true
        grant_types:
          - refresh_token
          - authorization_code
        response_types:
          - code
      - client_id: e4rAsNUSIUs0lF4nbv9FmCeUkTlV9GdgTLDH1b5uie7syb90SzEVrbN7HIpmWJeD
        client_name: ownCloud Android app
        # Well-known secret as plaintext
        # client_secret: 'dInFYGV33xKzhbRmpqQltYNdfLdJIfJ9L5ISoKhNoT9qZftpdWSP71VrpGR9pmoD'
        # Well-known secret hashed
        client_secret: '$pbkdf2-sha512$310000$Grnc1pW0blLl.2B1aEfEvg$JWW3s83SXkgSvoykJ5yD4i11gfrxBOEEGrKXjbyAh.PmVc14FDwSAzxVn7JFXjvO0B0V2RxFsrUT4RZoBK93ug'
        scopes:
          - openid
          - groups
          - profile
          - email
          - offline_access
        redirect_uris:
          - oc://android.owncloud.com
        allow_multiple_auth_methods: true
        grant_types:
          - refresh_token
          - authorization_code
        response_types:
          - code
      - client_id: mxd5OQDk6es5LzOzRvidJNfXLUZS2oN3oUFeXPP8LpPrhx3UroJFduGEYIBOxkY1
        client_name: ownCloud iOS app
        # Well-known secret as plaintext
        # client_secret: 'KFeFWWEZO9TkisIQzR3fo7hfiMXlOpaqP8CFuTbSHzV1TUuGECglPxpiVKJfOXIx'
        # Well-known secret hashed
        client_secret: '$pbkdf2-sha512$310000$O1agtCxk9EGgvVLZBJumVQ$4UmQmefvIe5jQx1iJDN5pFIuu6CG.v.59wK7xCk3KU6pGbtxGrO0OYtQ/m/TPzE1xZnxgO12.ujXN20sCr/LkQ'
        scopes:
          - openid
          - groups
          - profile
          - email
          - offline_access
        redirect_uris:
          - oc://ios.owncloud.com
          - oc.ios://ios.owncloud.com
        allow_multiple_auth_methods: true
        grant_types:
          - refresh_token
          - authorization_code
        response_types:
          - code
Restart Authelia
We changed the container’s environment, which makes it necessary to recreate the container (stopping and starting is not enough). Navigate into the authelia directory and run:
docker compose down
docker compose up -d
Inspect the container logs for errors with the command docker compose logs --tail 30 --timestamps.
ownCloud: Enable OpenID Connect Authentication
container-vars.env File
Add the following to ownCloud’s container-vars.env:
OCIS_OIDC_ISSUER=https://auth.home.yourdomain.com    # replace with your domain (no slash at end of domain!)
WEB_OIDC_CLIENT_ID=ownCloud-web                      # replace with your client ID
PROXY_OIDC_REWRITE_WELLKNOWN=true

# Without this, I got the following errors in the ownCloud log:
# Authentik: failed to verify access token: the JWT has an invalid kid: could not find kid in JWT header
# Authelia: failed to verify access token: token contains an invalid number of segments
PROXY_OIDC_ACCESS_TOKEN_VERIFY_METHOD=none
Restart ownCloud
We changed the container’s environment, which makes it necessary to recreate the container (stopping and starting is not enough). Navigate into the owncloud directory and run:
docker compose down
docker compose up -d
Inspect the container logs for errors with the command docker compose logs --tail 30 --timestamps.
Caddy: Remove ownCloud’s OIDC Prompt Parameter for Authelia
When authenticating via OpenID Connect in the browser, ownCloud’s desktop client sends a prompt parameter that Authelia doesn’t yet know how to handle (it’s planned for OIDC beta 7). To work around this temporary limitation, I removed the offending parameter with a uri replace Caddy command. The complete Caddyfile now looks like this:
auth.{$MY_DOMAIN} {
	# This is necessary until Authelia learns prompt handling. It's planned for beta 7 (https://www.authelia.com/roadmap/active/openid-connect/#beta-7).
	# Without this, the ownCloud desktop client cannot authenticate.
	uri /api/oidc/authorization replace &prompt=select_account%20consent ""

	reverse_proxy authelia:9091
	tls {
		dns cloudflare {env.CLOUDFLARE_API_TOKEN}
	}
}
Reload Caddy’s Configuration
Instruct Caddy to reload its configuration by running:
docker exec -w /etc/caddy caddy caddy reload
You should now be able to log into ownCloud’s web interface at https://owncloud.home.yourdomain.com with the user defined in Authelia.
SSO via authentik: ownCloud OpenID Connect Authentication
This section describes how to set up single sign-on to ownCloud via OpenID Connect authentication to authentik. If prefer to use Authelia, you can ignore this section and use the alternative configuration above.
authentik: Configure Domain-Level Proxy Provider
Every domain protected by authentik needs a proxy definition so that authentik knows what to do with requests to the domain’s URL. This also enables us to define exclusions for paths that must be accessible without authentication.
Modify the domain-level proxy provider we created in the last article by adding unauthenticated paths. Navigate to Applications > Providers. Edit the Home forward auth provider and add the following to Unauthenticated paths:
https://owncloud.home.yourdomain.com/*
The reasoning behind this: we don’t need authentik to enforce ownCloud authentication; ownCloud does that on its own. Certain ownCloud paths must be accessible without authentication, e.g., /default.php.
authentik: Configure OpenID Connect IdP
Create OIDC Providers
We need to create OIDC client configurations for ownCloud’s four different apps: web, desktop, Android, and iOS. The required settings are documented here and are also part of the Keycloak configuration example. In authentik, OIDC clients are configured as providers.
Prepare creating providers by navigating to Admin Interface > Applications > Providers.
OIDC Provider for the ownCloud Web Client
Create a new OAuth2/OpenID Provider with the following settings:
- Name: ownCloud-Web-OIDC
- Authorization flow: default-provider-authorization-explicit-consent
- Client type: Public
- Client ID: [use the autogenerated value]
- Redirect URIs:
https://owncloud.home.yourdomain.com/https://owncloud.home.yourdomain.com/oidc-callback.htmlhttps://owncloud.home.yourdomain.com/oidc-silent-redirect.html
OIDC Provider for the ownCloud Desktop Client
Create a new OAuth2/OpenID Provider with the following settings:
- Name: ownCloud-Desktop-OIDC
- Authorization flow: default-provider-authorization-explicit-consent
- Client type: Confidential
- Client ID: xdXOt13JKxym1B1QcEncf2XDkLAexMBFwiT9j6EfhhHFJhs2KM9jbjTmf8JBXE69
- Client secret: UBntmLjC2yYCeHwsyj73Uwo9TAaecAetRwMw0xYcvNL9yRdLSUi0hUAHfvCHFeFh
- Redirect URIs:
http://127.0.0.1(:.*)?http://localhost(:.*)?
OIDC Provider for the ownCloud Android App
Create a new OAuth2/OpenID Provider with the following settings:
- Name: ownCloud-Android-OIDC
- Authorization flow: default-provider-authorization-explicit-consent
- Client type: Confidential
- Client ID: e4rAsNUSIUs0lF4nbv9FmCeUkTlV9GdgTLDH1b5uie7syb90SzEVrbN7HIpmWJeD
- Client secret: dInFYGV33xKzhbRmpqQltYNdfLdJIfJ9L5ISoKhNoT9qZftpdWSP71VrpGR9pmoD
- Redirect URIs:
oc://android.owncloud.com
OIDC Provider for the ownCloud iOS App
Create a new OAuth2/OpenID Provider with the following settings:
- Name: ownCloud-iOS-OIDC
- Authorization flow: default-provider-authorization-explicit-consent
- Client type: Confidential
- Client ID: mxd5OQDk6es5LzOzRvidJNfXLUZS2oN3oUFeXPP8LpPrhx3UroJFduGEYIBOxkY1
- Client secret: KFeFWWEZO9TkisIQzR3fo7hfiMXlOpaqP8CFuTbSHzV1TUuGECglPxpiVKJfOXIx
- Redirect URIs:
oc://ios.owncloud.comoc.ios://ios.owncloud.com
Create Applications
In authentik, providers have a 1:1 relationship with applications. Every provider needs an application that specifies the appearance of and controls who has access to the provider.
Prepare creating applications by navigating to Admin Interface > Applications > Applications.
Application for the ownCloud Web Client
Create a new Application using the following settings:
- Name: ownCloud web client
- Provider: ownCloud-Web-OIDC
- Launch URL:
https://owncloud.home.yourdomain.com - Icon: upload a square icon that is displayed on the library page (“my applications”). I used this one.
Application for the ownCloud Desktop Client
Create a new Application using the following settings:
- Name: ownCloud desktop client
- Provider: ownCloud-Desktop-OIDC
- Launch URL:
blank://blank(this hides the application in the library page (“my applications”))
Application for the ownCloud Android App
Create a new Application using the following settings:
- Name: ownCloud Android app
- Provider: ownCloud-Android-OIDC
- Launch URL:
blank://blank
Application for the ownCloud iOS App
Create a new Application using the following settings:
- Name: ownCloud iOS app
- Provider: ownCloud-iOS-OIDC
- Launch URL:
blank://blank
ownCloud: Enable OpenID Connect Authentication
container-vars.env File
Still in authentik’s admin interface, navigate to Applications > Providers > ownCloud-Web-OIDC. From the values displayed here, you need the following in your ownCloud configuration:
- OpenID Configuration Issuer
- Client ID
Add the following to ownCloud’s container-vars.env, filling in the values above:
OCIS_OIDC_ISSUER=https://auth.home.yourdomain.com/application/o/owncloud-web-client/ # replace with your domain
WEB_OIDC_CLIENT_ID=YOUR_CLIENT_ID     # replace with your client ID
PROXY_OIDC_REWRITE_WELLKNOWN=true

# Without this I got the following error in the ownCloud log: failed to verify access token: the JWT has an invalid kid: could not find kid in JWT header
PROXY_OIDC_ACCESS_TOKEN_VERIFY_METHOD=none
Restart ownCloud
We changed the container’s environment, which makes it necessary to recreate the container (stopping and starting is not enough). Navigate into the owncloud directory and run:
docker compose down
docker compose up -d
Inspect the container logs for errors with the command docker compose logs --tail 30 --timestamps.
Caddy: Enable Forward Authentication via authentik
Caddyfile
Add the import authentik directive to the ownCloud section of your Caddyfile (details). It should now look as follows:
owncloud.{$MY_DOMAIN} {
	import authentik
	reverse_proxy owncloud:9200
	tls {
		dns cloudflare {env.CLOUDFLARE_API_TOKEN}
	}
}
Reload Caddy’s Configuration
Instruct Caddy to reload its configuration by running:
docker exec -w /etc/caddy caddy caddy reload
You should now be able to log into ownCloud’s web interface at https://owncloud.home.yourdomain.com with the user-defined in authentik.
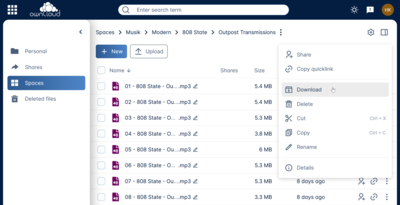
Create Spaces
Spaces are a new and very useful feature of ownCloud. Think of a space as a data container that can be shared with others. Spaces can be synchronized independently of each other, so you can choose which spaces you need on any given device.
Examples of the spaces that I’m using:
- My data
- Pictures
- Videos
- Music
When you create a space you may want to remove the default 1 GB quota.
Install ownCloud Client Apps
Windows Desktop Client
Download the desktop app for Windows. You’ll find the current version here, older versions, as well as daily builds, betas, etc., are available here.
When you launch the app after the installation, the connection wizard comes up. Enter the server address https://owncloud.home.yourdomain.com and click Next. Authenticate in the browser. After that, the ownCloud client should tell you that you’re all set. If you close the wizard, it’ll sync your personal folder as well as your spaces to subfolders of %USERPROFILE%\ownCloud.
Different Sync Target Directories per Space
You may want to click Advanced configuration instead and select Configure synchronization manually. Now you can configure spaces individually and sync them to different directories on your machine. To configure synchronization of a space (or your personal folder), click Add a space (which is incorrectly labeled Add folder sync connection in version 3.0 of the desktop client).
Desktop Client Settings
In the client’s settings, I de-selected Ask for confirmation before synchronizing folders larger than 499 MB.
Sync Errors (Access Denied)
If you get access denied errors while synchronizing (Error updating metadata: WindowsError: ffffffff80070005), take a look at this issue. It’ll hopefully be fixed in a future version of the client (I’m using 3.0).
To work around the errors, you have two options:
- disable virtual file support
- assign
full controlfile system permissions on the synchronized files and folders
Notes
Applications/Extensions
- oCIS cannot use the applications from the ownCloud Marketplace. Due to its new architecture, it requires new types of add-ons called extensions (docs).
Add CORS Support for Caddy (Not Required)
Note: This was part of my original configuration. As I found out, CORS handling can be configured much more elegantly in Authelia. I’m leaving this description here in case someone may need it in the future.
Caddy doesn’t come with support for CORS (cross-origin resource sharing), which means that ownCloud’s JavaScript code cannot access Authelia’s resources for authentication. We’ll fix that by defining a generic snippet that can be used with any application to be protected by Authelia. Add the following to Caddyfile (details):
#
# CORS handling
# This is a modified version of: https://kalnytskyi.com/posts/setup-cors-caddy-2/
#
(cors) {
	@cors_preflight method OPTIONS
	@cors header Origin {args[0]}

	handle @cors_preflight {
		header {
			Access-Control-Allow-Origin "{args[0]}"
			Access-Control-Allow-Methods "GET, POST, PUT, PATCH, DELETE, OPTIONS"
			Access-Control-Allow-Headers *
			Access-Control-Max-Age "3600"
			defer
		}
		respond "" 204
	}

	handle @cors {
		header {
			Access-Control-Allow-Origin "{args[0]}"
			Access-Control-Expose-Headers *
			defer
		}
	}
}
Add the directive import cors ownCloud-URL to the Authelia section of your Caddyfile. It should now look as follows:
auth.{$MY_DOMAIN} {
	import cors https://owncloud.{$MY_DOMAIN}
	reverse_proxy authelia:9091
	tls {
		dns cloudflare {env.CLOUDFLARE_API_TOKEN}
	}
}
Changelog
2024-10-13
- Switched from the deprecated
identity_providers.oidc.issuer_private_keytoidentity_providers.oidc.jwks.
2024-04-14
- Removed the
versionfromdocker-compose.yml; a warning mentions that it’s obsolete.
2024-03-17
Updated Configuration for Authelia 4.38 & ownCloud 5
The following Authelia settings need to be changed or updated (see also Authelia issue #6904):
- Migrate
oidc.access_token_lifespanandoidc.refresh_token_lifespantolifespans.*. - Add
oidc.clients.id.allow_multiple_auth_methods. - Add
oidc.clients.id.grant_types. - Add
oidc.clients.id.response_types. - Rename
oidc.clients.idtooidc.clients.client_id. - Rename
oidc.clients.descriptiontooidc.clients.client_name. - Rename
oidc.clients.secrettooidc.clients.client_secret.
Unresolved warnings:
configuration key 'identity_providers.oidc.issuer_private_key' is deprecated in 4.38.0 and has been replaced by 'identity_providers.oidc.jwks'. However, when renamingAUTHELIA_IDENTITY_PROVIDERS_OIDC_ISSUER_PRIVATE_KEY_FILEtoAUTHELIA_IDENTITY_PROVIDERS_OIDC_JWKS_FILEAuthelia won’t start.session: option 'domain' is deprecated in v4.38.0 and has been replaced by a multi-domain configuration. Apparently, the cookie session domain now cannot be specified as an environment variable anymore (source).
2023-11-22
Moved CORS Handling from Caddy to Authelia
CORS can be handled much more elegantly by making adding the cors setting to Authelia’s configuration than by fiddling around with requests in Caddy.
Troubleshooting Attempts
I fruitlessly experiemented with the Authelia configuration, trying to get rid of a nasty bug affecting the ownCloud Android app: after filling out the server URL in the ownCloud app and successfully authenticating with Authelia, the user is redirected to the server address screen, but now the URL empty. I also tried to get rid of the frequent prompts for reauthentication - again, fruitlessly.
I tried the following changes to Authelia’s oidc configuration:
- Setting
publictotrue, commenting out the secret (which isn’t secret anyway) and adding the client’sidasaudience. - Setting
consent_modetopre-configuredandpre_configured_consent_durationto1m.
It seems the frequent reauthentications are a refresh token issue which will be fixed in Authelia’s next version 4.38.0, hopefully to be released soon (source).
2023-10-14
Caddyfile:
- Replaced
{args.0}with{args[0]}for compatibility with Caddy 2.7.x.
2023-06-17
Added the following to Authelia’s configuration file:
- Missing lines containing
identity_providers:andoidc:. access_token_lifespan: 2dandrefresh_token_lifespan: 3dto work around frequent prompts to re-authenticate in the ownCloud (desktop and Android) apps.


Comments