Installing Proxmox as Docker Host on Intel NUC Home Server
- Home Automation, Networking & Self-Hosting
- Published Nov 23, 2022 Updated Sep 14, 2024
This is my first article in what is poised to become a series on installing, configuring, and running a home server with (dockerized or virtualized) services such as Home Assistant and ownCloud.
Home Server Hardware
Selection Criteria
I was looking for the following when I selected my home server hardware:
- Linux support
- Small form factor
- Fast CPU
- Good single-thread performance
- At least 4 cores
- Low power consumption
- 2.5 GbE
Hardware Model
I considered building my own, but good small form-factor (SFF) cases are rare, and the few interesting cases seem to be geared toward gamers. A home server does not need a powerful GPU, so I went with an Intel NUC instead. The Intel NUC 12 Pro Kit NUC12WSHi7 is a NUC variant with a taller case that can be fitted with a 2.5" disk drive in addition to the M.2 SSD(s).
- CPU: i7-1260P, mobile CPU, 28 W TDP (specs)
- 12 cores (4 performance, 8 efficiency)
- Cinebench R23 single-core: 1737
- Cinebench R23 multi-core: 9743
- RAM: 2 DIMMs, max. 64 GB
- Disk options:
- 1 x M.2 2280 NVMe SSD (PCIe x4)
- 1 x M.2 2242 SATA SSD (PCIe x1)
- 1 x 2.5" SATA disk
- Supported operating systems: Windows 10/11, Red Hat Linux, Ubuntu 20.04 LTS
Home Server OS: Why Proxmox?
A home server is, first and foremost, a workhorse, just like any other server. Unlike a server in a company’s data center, though, a home server is part of a long-lived structure, a building. That is why a home server needs an operating system that is long-term stable and can be run without frequent “hand-holding” (aka administration). Also, a non-commercial (free) license is more than welcome.
Given these requirements, Linux is the OS of choice. Proxmox, with its good ZFS support and functional web UI, is the obvious distribution.
Installing Proxmox
Preparation
Update the NUC’s BIOS:
- Copy the BIOS
.CAPfile to a USB drive - Press F7 during boot
- Select the
.CAPfile and start the update
Disable Secure Boot in the BIOS (docs):
- Press F2 during boot to enter the BIOS
- Go to Advanced > Boot > Secure Boot
- Disable Secure Boot
Proxmox Installation
In place of a screen-by-screen replay of the installation process, I’ll simply list the relevant settings:
- File system: ZFS
- Swap partition (1)
- The installer does not create a swap partition
- Locating the swap partition on ZFS is a bad idea because ZFS needs lots of RAM
- Instead, reserve 8 GB in the advanced options of Proxmox’s installer
- Select Target > Options
- Filesystem:
zfs (RAID0) - Open Advanced Options
- Reduce
hdsizeby8
- Network configuration
- IP address
- DHCP works, but is not officially supported (config).
- The official DNS domain for home networks is home.arpa (RFC8375).
- I’m using a public DNS domain instead because I want to use Let’s encrypt certificates verified through the DNS challenge (details in a future article).
- To change the IP address, edit these files:
/etc/network/interfaces/etc/hosts
- To change the hostname or DNS domain, edit these files:
/etc/hosts/etc/hostname
- IP address
Initial Configuration
Update Proxmox
Update Repositories
If you’re using the free version of Proxmox VE (i.e., you don’t have a subscription), update repositories as follows:
- Web UI > INSTANCE > Updates > Repositories > Add
- Add the
No-Subscriptionrepository
- Add the
- Disable the enterprise repository (because it requires a subscription)
Upgrade Proxmox
To upgrade Proxmox:
- Click
Refreshto runapt update - Click
Upgradeto runapt dist-upgrade
Upgrade the ZFS Pool
After a Proxmox upgrade it’s good idea to check if the ZFS pool can be upgraded by enabling additional feature flags:
# Get the pool's status
zpool status

# Upgrade the pool's features flags
zpool upgrade -a
Disk Setup
Swap Partition
Create & enable the swap partition (docs):
- Show swap config:
swapon -s- There should be no output = no swap partition
- Run
cfdiskto create a partition in the 8 GB of free space- This creates
/dev/sda4.
- This creates
- Run
mkswapto get the UUID:mkswap /dev/sda4 - Enable swapping:
swapon -U <UUID> - Add the following line to
/etc/fstab:UUID=<UUID> none swap sw 0 0
SSD Trim
- Check if trim is enabled:
zpool get autotrim rpool - Enable trim if disabled:
zpool set autotrim=on rpool
ZFS Storage Setup
Change Default ZFS Storage Name
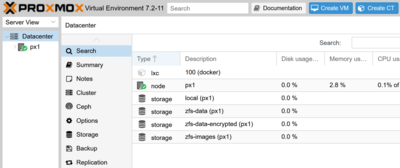
The installer created a ZFS dataset with the name local-zfs. Rename it to zfs-data by editing /etc/pve/storage.cfg.
Create Encrypted ZFS Dataset
Set up an encrypted dataset:
zfs create -o encryption=on -o keyformat=passphrase rpool/encrypted
Prevent writes to the mountpoint when the encrypted ZFS is not mounted (i.e., the password has not yet been typed in):
chattr +i /rpool/encrypted/
Create a new storage location in the UI: Web UI > Datacenter > Storage > Add:
- ID:
zfs-data-encrypted - ZFS Pool:
rpool/encrypted - Content: Disk image, Container
- Thin provision: checked
Note: The following command needs to be typed in at the (SSH) console after every reboot: zfs mount -la.
Create ZFS Dataset for Images
- Create a ZFS dataset for VM/container images:
zfs create rpool/vmdata - Enable compression:
zfs set compression=on rpool/vmdata - Create a new storage location in the UI: Web UI > Datacenter > Storage > Add
- ID:
zfs-images - ZFS Pool:
rpool/vmdata - Content: Disk image, Container
- Thin provision: checked
- ID:
Network Setup
Network Bridge with NAT
The Proxmox setup should have created the bridged network vmbr0 where VMs/containers have direct access to the network. We’ll add a second internal network with NAT for VMs/containers that don’t need to be reachable from outside.
Add the following to /etc/network/interfaces:
auto vmbr1
iface vmbr1 inet static
   address        10.10.10.1/24
   bridge-ports   none
   bridge-stp     off
   bridge-fd      0

   post-up   echo 1 > /proc/sys/net/ipv4/ip_forward
   post-up   iptables -t nat -A POSTROUTING -s '10.10.10.0/24' -o vmbr0 -j MASQUERADE
   post-down iptables -t nat -D POSTROUTING -s '10.10.10.0/24' -o vmbr0 -j MASQUERADE
Reboot the Proxmox host. You can verify the interface status with ip a. Note, though, that the newly added NAT interface vmbr1 will show as NO-CARRIER until you connect a VM or container to it.
Two-Factor Authentication (2FA)
- Enable TOTP for the current (root) user: Web UI > Datacenter > Permissions > Two Factor > Add > TOTP.
- Generate recovery keys for the root user: Web UI > Datacenter > Permissions > Two Factor > Add > Recovery Keys.
SSH Access
Create a key pair on your PC and upload it to your user’s SSH key file as described here. Once you’ve verified public key authentication, disable password authentication as described in the linked article.
Firewall
Proxmox VE comes with a firewall, but it’s disabled by default. We’ll enable it and configure a minimal set of rules in the web UI.
Rules
The below rules assume that you’ve already configured Caddy as a reverse proxy as described in this article. If you haven’t, leave the firewall unconfigured for the time being.
SSH access to the Proxmox host:
- Direction:
in - Action:
ACCEPT - Macro:
SSH - Enable: checked
HTTP and HTTPS access to any dockerized services:
- Direction:
in - Action:
ACCEPT - Macro:
HTTPS - Enable: checked
Note: browsers sometimes try HTTP first. If you don’t allow it, some requests might time out.
Proxmox web UI access from Docker (specifically, the caddy container acting as reverse proxy). Note: find the Docker subnet with the command docker network inspect caddy_caddynet.
- Direction:
in - Action:
ACCEPT - Protocol:
tcp - Source:
172.19.0.0/16 - Destination port:
8006 - Enable: checked
Ping (ICMP):
- Direction:
in - Action:
ACCEPT - Protocol:
icmp - Enable: checked
Enable
To enable the firewall, navigate to Datacenter > Firewall > Options, edit the Firewall setting and enable the checkbox.
If you made a mistake and locked yourself out of the web UI, you can stop the firewall on the command line with pve-firewall stop.
Installing Docker
Docker in an Unprivileged LXC Container?
While it’s possible to run Docker in an unprivileged LXC container, it introduces another abstraction layer, increasing complexity. It’s also too unstable to be used in production. Since I’m looking for low maintenance and long-term stability, I decided to install Docker natively on the Proxmox host.
By the way, I decided against rootless Podman for similar reasons. The official list of shortcomings is simply too long.
Install Docker on Proxmox
We’re installing Docker along with Docker Compose from the official Docker repository according to the docs:
Update:
apt update
Install the required packages to access the Docker repository via HTTPS:
apt install ca-certificates curl gnupg lsb-release
Add Docker’s GPG key:
mkdir -p /etc/apt/keyrings
curl -fsSL https://download.docker.com/linux/debian/gpg | gpg --dearmor -o /etc/apt/keyrings/docker.gpg
Add Docker’s stable repository:
echo "deb [arch=$(dpkg --print-architecture) signed-by=/etc/apt/keyrings/docker.gpg] https://download.docker.com/linux/debian $(lsb_release -cs) stable" | tee /etc/apt/sources.list.d/docker.list > /dev/null
Update and install Docker:
apt update
apt install docker-ce docker-ce-cli containerd.io docker-compose-plugin
Verify that Docker is installed correctly by running an image that prints a message and exits:
systemctl status docker
docker run --rm hello-world
Configuring Docker
Log Rotation
By default, log rotation is disabled (docs). To enable log rotation, create a Docker config file /etc/docker/daemon.json with the following content:
{
  "log-driver": "json-file",
  "log-opts": {
    "max-size": "10m",
    "max-file": "3"
  }
}
Restart the Docker daemon (service docker restart). To verify, run docker info.
Docker Data Directory
On the Proxmox host, create Docker data directories:
mkdir /rpool/data/docker
mkdir /rpool/encrypted/docker
Docker Service: Wait for Encrypted ZFS Volume Mount After Boot
A problem with encrypted ZFS volumes is that they need to be unlocked after each reboot. If you chose the secure option of requiring a passphrase, the encrypted ZFS volume won’t be mounted until after you SSH into the machine, run the zfs mount command, and type in the passphrase. If you have Docker compose files on the encrypted volume, Docker won’t be able to start those containers at boot.
Luckily, there is a simple solution: delay the start of the Docker service until the encrypted ZFS volume has been unlocked (source). Here’s how to configure this:
Create the file /usr/local/bin/wait-for-unlock.sh with the following content:
#!/bin/sh
# wait-for-unlock.sh

while true; do
  if df | grep -q '/rpool/encrypted';
  then
    echo "unlocked, exiting..."
    exit
  else
    echo "still locked, waiting for 10 seconds and trying again..."
    sleep 10
fi
done
Make wait-for-unlock.sh executable:
chmod a+x /usr/local/bin/wait-for-unlock.sh
Create a unit file snippet for the Docker service:
systemctl edit docker
Paste the following two lines in the editor window that opened and save the file:
[Service]
ExecStartPre=/usr/local/bin/wait-for-unlock.sh
That’s it! With this modification, the Docker daemon is only started once wait-for-unlock.sh returns - which it does once the encrypted ZFS volume has been mounted. If you inspect the status of the Docker service before the encrypted ZFS volume has been mounted with systemctl status docker, you’ll see the following:
Dec 10 01:12:27 px1 systemd[1]: Starting Docker Application Container Engine...
Dec 10 01:12:28 px1 wait-for-unlock.sh[2060]: still locked, waiting for 10 seconds and trying again...
Dec 10 01:12:38 px1 wait-for-unlock.sh[2060]: still locked, waiting for 10 seconds and trying again...
Dec 10 01:12:48 px1 wait-for-unlock.sh[2060]: still locked, waiting for 10 seconds and trying again...
Troubleshooting Docker
Performance Monitoring With ctop
The traditional Linux top command is not great for monitoring containers. Enter ctop. Install it as follows:
curl -fsSL https://azlux.fr/repo.gpg.key | gpg --dearmor -o /usr/share/keyrings/azlux-archive-keyring.gpg
echo "deb [arch=$(dpkg --print-architecture) signed-by=/usr/share/keyrings/azlux-archive-keyring.gpg] http://packages.azlux.fr/debian $(lsb_release -cs) main" | tee /etc/apt/sources.list.d/azlux.list
apt update
apt install docker-ctop
Inspecting Container Logs
Docker captures stdout and stderr output from within containers and writes it to log files. To inspect, use docker compose logs (docker logs works, too), e.g., like this:
docker compose logs <container> --tail 30 --timestamps
Resources
Changelog
2024-06-24
- Added the section Upgrade the ZFS Pool.
2023-06-04
- Added the section Firewall.
2023-01-05
- Added the section Performance Monitoring With ctop.
2022-12-09
- Added the section Docker Service: Wait for Encrypted ZFS Volume Mount After Boot.
2022-12-08
- Added the command
chattr +i /rpool/encrypted/to prevent writes to the encrypted ZFS mountpoint while the ZFS volume is unmounted.


Comments