Samba File Server: Web Access Through Filebrowser With SSO & HTTPS
- Home Automation, Networking & Self-Hosting
- Published Jul 14, 2024 Updated Aug 24, 2025
This article explains how to set up Filebrowser in a Docker container as a web interface for browser-based access to a Samba file server.
Please note that in my own use this configuration has been superseded by a Filestash setup which has the advantage of accessing the storage as the authenticating user. Filebrowser and other tools like it have the disadvantage of accessing the file system through one “service” user account. This means that what the browser shows is not what the actual user is allowed to access but instead what the service account has permission to read. Also, when files are created, the owning user is the service account. This post is part of my series on home automation, networking & self-hosting that shows how to install, configure, and run a home server with dockerized or virtualized services. This article is part of a mini-series about running Samba Active Directory and a file server service in a Docker container on a home server:
- Samba Active Directory in a Docker Container: Installation Guide
- Samba Active Directory as Authelia’s Authentication Backend
- Samba File Server With Windows ACLs in a Docker Container
- Samba File Server With POSIX ACLs in a Docker Container
- Web Access Through Filebrowser With SSO & HTTPS (this article)
- Web Access Through Filestash With Passthrough Auth
- GitHub repository with Docker files and helper scripts
Please read the previous articles of this mini-series before proceeding.

Filebrowser Installation
Installing Filebrowser via its Docker image is straightforward. Things to note:
- We’re using the S6 image (linuxserver.io base) because it more cleanly separates code from data.
- We’re mounting the directory from the (independent) Samba file server container.
- We’re running the Filebrowser container as UID 0 (
root) and GID10513(Domain Users) which matches the owner/group used by Samba.
Preparation
I’m assuming that you’ve set up Docker, the Caddy container and a Samba file server as described in the previous articles in this series.
Dockerized Filebrowser Directory Structure
This is what the directory structure will look like when we’re done:
rpool/
 └── encrypted/
     └── docker/
         └── filebrowser/
             ├── config/
                 └── settings.json
             ├── db/
             └── docker-compose.yml
We’re placing the configuration on the encrypted ZFS dataset (rpool/encrypted).
Create the new directories:
mkdir -p /rpool/encrypted/docker/filebrowser/config
mkdir -p /rpool/encrypted/docker/filebrowser/db
Filebrowser Docker Compose File
Create docker-compose.yml with the following content:
services:

  filebrowser:
    container_name: filebrowser
    hostname: filebrowser
    image: filebrowser/filebrowser:s6
    restart: unless-stopped
    networks:
      caddy_caddynet:
    expose:
      - 80                                        # Web UI
    environment:
      - PUID=0
      - PGID=10513
    volumes:
      - /etc/localtime:/etc/localtime:ro
      - ./config:/config
      - ./db:/database
      - ../samba/shares-fs1/data:/srv:ro          # Mount fs1 data read-only

networks:
  caddy_caddynet:
    external: true
Filebrowser Config File
Create config/settings.json with the following content:
{
  "port": 80,
  "baseURL": "",
  "address": "",
  "log": "stdout",
  "database": "/database/filebrowser.db",
  "root": "/srv"
}
Start the Filebrowser Container
Navigate into the directory with docker-compose.yml and run:
docker compose up -d
Inspect the container logs for errors with the command docker compose logs --tail 30 --timestamps. You should see output similar to the following:
User UID:    0
User GID:    10513
───────────────────────────────────────

[custom-init] No custom files found, skipping...
[ls.io-init] done.
2024/06/30 23:56:22 Warning: filebrowser.db can't be found. Initialing in /database/
2024/06/30 23:56:22 Using database: /database/filebrowser.db
2024/06/30 23:56:22 Using config file: /config/settings.json
2024/06/30 23:56:22 Listening on [::]:80
Let’s Encrypt Certificate for Filebrowser via Caddy
Caddyfile
Add the following to Caddyfile (details):
files.{$MY_DOMAIN} {
	reverse_proxy filebrowser:80 {
	}
	tls {
		dns cloudflare {env.CLOUDFLARE_API_TOKEN}
	}
}
DNS A Record
Add the following A record to your DNS domain:
files.home.yourdomain.com 192.168.0.4 # replace with your Docker host's IP address
Try to resolve the name on a machine in your network (e.g., nslookup files.home.yourdomain.com).
Reload Caddy’s Configuration
Instruct Caddy to reload its configuration by running:
docker exec -w /etc/caddy caddy caddy reload
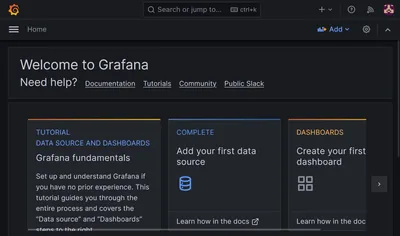
You should now be able to access the Filebrowser web interface at https://files.home.yourdomain.com without getting a certificate warning from your browser.
Create Filebrowser User(s)
SSO users need to exist in Filebrowser. Therefore, we need to create at least one user with admin rights before we can enable SSO.
In your browser, navigate to https://files.home.yourdomain.com and log on with the user/password admin/admin.
Navigate to Settings > User Management and create a new user for yourself with the same name as in Authelia. Assign Administrator permissions. Do set a password; it won’t be used once SSO is enabled.
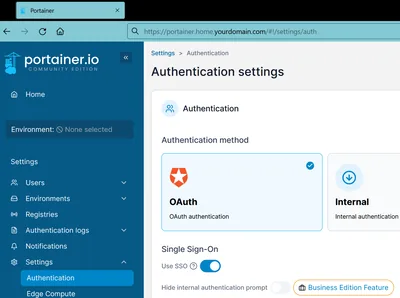
Enable SSO via Authelia
Filebrowser Configuration
Modifying settings of a Filebrowser instance running in a Docker container is a bit more convoluted than it should be:
# Exec into the container
docker exec -it filebrowser /bin/bash

# Copy the (locked) database
cp /database/filebrowser.db /database/copied.db

# Apply the desired settings on the copied DB
filebrowser config set --auth.method=proxy --auth.header=Remote-User -d /database/copied.db

# Exit from the container
exit

# Stop the container
docker compose down

# Delete the original DB and replace it with our modivied version
rm db/filebrowser.db

# Rename the copied DB to the original name
mv db/copied.db db/filebrowser.db

# Start the container
docker compose up -d
Authentication via Caddy
Modify your Caddy configuration so that it looks as follows:
# Filebrowser site
files.{$MY_DOMAIN} {
	import auth
	reverse_proxy filebrowser:80 {
	}
	tls {
		dns cloudflare {env.CLOUDFLARE_API_TOKEN}
	}
}
Note: the definition of the auth snippet can be found here.
Reload Caddy’s configuration as shown above.
Open the Filebrowser URL https://files.home.yourdomain.com/ in your browser. Once you’ve authenticated with Authelia you’re logged on transparently.
Initial Filebrowser Configuration
The following is my recommended configuration. Navigate to Settings > Profile Settings and configure the following
- Hide dotfiles: checked
- Use single clicks to open files and directories: checked
- Language: [select your language]
Click Update to save the changes.
Switch to the Global Settings tab and configure the following in the section User default settings:
- Language: select your preferred language
- Permissions: adjust as needed
Click Update to save the changes.
Switch to the User Management tab and configure the following
- Deleting the default
adminuser is not possible, so we do the following instead:- Set a complex password.
- Remove all permissions.
Alternatives to Filebrowser
In my research I found the following potential alternatives to Filebrowser:
- Tiny File Manager
- Requires a web server with PHP.
- IFM
- Requires a web server with PHP.
- Filestash
- SSO not available in free version.
Changelog
2025-03-04
- Caddy config: replaced the explicit
forward_authdefinition with a snippet import.


Comments