Helge's Profile Toolkit
- User Profiles
- Published May 9, 2011 Updated Apr 17, 2014
Helge’s Profile Toolkit is a collection of tips, tricks and tools for working with user profiles.
The Profile Toolkit
This article is just an appetizer - the entire kit is spread across the following posts on this site:
Profile Design
- User Profile Design: A Primer
- Should Roaming User Profiles Be Backed Up?
- Can I Use the Same User Profile on 32-bit and 64-bit Windows?
- Profile Hell – The Reality of Windows User Profiles
- Why User Profiles Always Get Bigger, Never Smaller: Installers
Maintenance and Troubleshooting
- Temporary User Profiles
- Customizing the Default Profile
- How to Reduce the Size of Roaming Profiles
- Error Message Explained: User Profile Service Failed the Logon
Mandatory Profiles
- Mandatory Profiles – The Good, the Bad and the Ugly
- Are Mandatory User Profiles Deleted at Logoff – or Cached?
- [Mandatory Profiles – Insecure by Default?](/blog/mandatory-profiles-–-insecure-by-default/ “Mandatory Profiles – Insecure by Default?”/)
Profile Storage
- User Profile and Home Directory Storage: Distributing the Load Across Multiple File Servers
- Replicating User Profiles Between Sites (With or Without DFS) – Why it Should be Avoided
- How to Configure a File Server for Hosting User Profiles
Folder Redirection
- Should AppData be Redirected or Left in the User Profile?
- Folder Redirection – Denial of Service Waiting to Happen
Profile Migration
- Free Script: User Profile Domain Migration with SetACL
- USMT and Beyond – Practical Tips for Your Migration
Profile Information
List All Profiles on a Computer
The following script (a modified version of this) makes use of the fact that several properties of locally stored user profiles are available via the WMI class Win32_UserProfile. It asks for a computer name and then lists all profiles on that machine along with last usage date, user SID and other properties (if there are any).
Option Explicit
On Error Resume Next

Dim strComputer
Dim objWMIService
Dim propValue
Dim objItem
Dim SWBemlocator
Dim UserName
Dim Password
Dim colItems
Dim strMessage
Dim deleteResponse

strComputer = ""
UserName = ""
Password = ""
strMessage = ""

strComputer = InputBox("Please enter the FQDN of a computer:")

If strComputer = "" Then
	strComputer = "localhost"
End If

If Not Ping (strComputer) Then
    MsgBox "The computer (" + strComputer + ") is not responding to ping - exiting"
    WScript.quit
End if

Set SWBemlocator = CreateObject("WbemScripting.SWbemLocator")
Set objWMIService = SWBemlocator.ConnectServer(strComputer,"root\CIMV2",UserName,Password)
Set colItems = objWMIService.ExecQuery("Select * from Win32_UserProfile",,48)
For Each objItem in colItems

    strMessage = ""
    If not objItem.LastDownloadTime = "" Then
        strMessage = strMessage + "LastDownloadTime: " & left(objItem.LastDownloadTime,8) + Chr(10) + Chr(13)
    End If

    If Not objItem.LastUploadTime = "" Then
        strMessage = strMessage + "LastUploadTime: " & left(objItem.LastUploadTime,8) + Chr(10) + Chr(13)
    End if

    if not objItem.LastUseTime = "" then
        strMessage = strMessage + "LastUseTime: " & left(objItem.LastUseTime,8) + Chr(10) + Chr(13)
    End If

    If Not objItem.Loaded  = "" Then
        strMessage = strMessage + "Loaded: " & objItem.Loaded + Chr(10) + Chr(13)
    End If

    If not objItem.LocalPath = "" then
        strMessage = strMessage + "LocalPath: " & objItem.LocalPath + Chr(10) + Chr(13)
    End If

    if not objItem.RefCount = "" then
        strMessage = strMessage + "RefCount: " & objItem.RefCount + Chr(10) + Chr(13)
    End If

    if not objItem.RoamingConfigured = "" then
        strMessage = strMessage + "RoamingConfigured: " & objItem.RoamingConfigured + Chr(10) + Chr(13)
    End If

    if not objItem.RoamingPath = "" then
        strMessage = strMessage + "RoamingPath: " & objItem.RoamingPath + Chr(10) + Chr(13)
    End If

    if not objItem.RoamingPreference = "" then
        strMessage = strMessage + "RoamingPreference: " & objItem.RoamingPreference + Chr(10) + Chr(13)
    End If

    if not objItem.SID = "" then
        strMessage = strMessage + "SID: " & objItem.SID + Chr(10) + Chr(13)
    End If

    if not objItem.Special = "" then
        strMessage = strMessage + "Special: " & objItem.Special + Chr(10) + Chr(13)
    End If

    if not objItem.Status = "" then
        strMessage = strMessage + "Status: " & objItem.Status + Chr(10) + Chr(13)
    End If

	 WScript.Echo strMessage

Next

Function Ping(strHost)

    dim objPing, objRetStatus

    set objPing = GetObject("winmgmts:{impersonationLevel=impersonate}").ExecQuery _
      ("select * from Win32_PingStatus where address = '" & strHost & "'")

    for each objRetStatus in objPing
        if IsNull(objRetStatus.StatusCode) or objRetStatus.StatusCode<>0 then
                Ping = False
        else
            Ping = True
        end if
    Next
End Function
Sample output:
D:\>cscript ListLocalProfiles.vbs

LastUseTime: 20110427
LocalPath: C:\Users\hklein.SEPAGO
SID: S-1-5-21-789336058-920026266-854245398-3701

LastUseTime: 20110308
LocalPath: C:\Users\test
SID: S-1-5-21-3377029132-2631215491-2583730848-1013

LastUseTime: 20110427
LocalPath: C:\Windows\ServiceProfiles\NetworkService
SID: S-1-5-20

LastUseTime: 20110427
LocalPath: C:\Windows\ServiceProfiles\LocalService
SID: S-1-5-19

LastUseTime: 20090901
LocalPath: C:\Windows\system32\config\systemprofile
SID: S-1-5-18
Determine the Last Logon Time of a User
You might want to find out when a particular user last logged on to a specific computer. WMI can tell you:
C:\temp>wmic path Win32_NetworkLoginProfile get Name,LastLogon
LastLogon                  Name
                           NT-AUTORITÄT\SYSTEM
                           NT-AUTORITÄT\LOKALER DIENST
                           NT-AUTORITÄT\NETZWERKDIENST
20110415165337.000000+120  nb-hklein\hklein
20110428175956.000000+120  nb-hklein\helge
20101215225819.000000+060  nb-hklein\test
                           SEPAGO\hklein
This approach relies on a connection to the authenticating domain controller, which in my case was not reachable. Thus the lack of a timestamp for my main account sepago\hklein.
As an alternative and starting point for your own experiments here is a variant relying on the fact that the last time a profile was used is roughly equivalent to the timestamp of NTUSER.DAT:
C:\temp>for /f "delims=" %i in ('dir /a /b c:\users') do @(if exist c:\users\%i\ntuser.dat dir /a c:\users\%i\ntuser.dat)
 Volume in drive C is C
 Volume Serial Number is A80C-5556

 Directory of c:\users\Default

<strong>20.12.2010  13:08</strong>           262.144 NTUSER.DAT
               1 File(s)        262.144 bytes
               0 Dir(s)   3.963.305.984 bytes free
 Volume in drive C is C
 Volume Serial Number is A80C-5556

  Directory of c:\users\helge

<strong>28.04.2011  18:17</strong>         1.048.576 NTUSER.DAT
               1 File(s)      1.048.576 bytes
               0 Dir(s)   3.963.305.984 bytes free
 Volume in drive C is C
 Volume Serial Number is A80C-5556

  Directory of c:\users\test

<strong>08.03.2011  22:46</strong>           786.432 NTUSER.DAT
               1 File(s)        786.432 bytes
               0 Dir(s)   3.963.305.984 bytes free
Profile Maintenance
Profile Nurse
sepago’s free Profile Nurse is a versatile command-line tool for automated maintenance of roaming user profiles. It works like this: you feed it an INI file with commands. It loops over all user profiles in a specified directory and processes each profile according to the commands in the INI file. The list of available commands is impressive:
- Create/modify/delete registry keys and values
- Delete/rename files and directories
- Copy files into each profile
- Query the profile for specific files or registry values
- Query for large files, old files, files with specific attributes, …
List Mapped Network Printers
Without Profile Nurse, finding out which network printers are used by whom can be quite a challenge. Here is how to find out with her:
[GeneralSettings]
UserProfileDir="e:\profiles\<PROFILE_DIR>"

[RegistryQueryKey]
QuerySubKeys="1"
Path="Printers\Connections"
Name=",,*"
Save above INI file as MappedPrinters.ini and start Profile Nurse like this:
ProfileNurse -i MappedPrinters.ini -o MappedPrinters.txt -v
Profile Nurse processes all profiles in the directory E:\Profiles:
D:\>ProfileNurse -i MappedPrinters.ini -o MappedPrinters.txt -v -c
Starting nursing of profiles...
Using profile directory < \\?\E:\profiles\<PROFILE_DIR>\ >.
Successfully read general settings from <MappedPrinters.ini>.
Successfully read tasks from <MappedPrinters.ini>.
Processing profile <fakguen>...
Processing for profile <fakguen> successful.
Processing profile <helge>...
Processing for profile <helge> successful.
Processing profile <hklein>...
Processing for profile <hklein> successful.
Registry query output stored in: .\queries\reg-MappedPrinters.txt
Finished nursing all profiles.
The output from the query is written to the file .\queries\reg-MappedPrinters.txt. It might look like this:
--------------------------------------------------------------
     Registry key query (Date: 2011-05-10T23:08:39)

Query options:
Path:		\hklein\Printers\Connections
Recursive:	yes
Find:		matching all criteria
Name:		,,*

QueryKeys results for profile <hklein>:

Date                     Size        Name
---------------------------------------------------------
2011-05-10T23:07:46        0 byte  hklein\Printers\Connections\,,dc03,OG_A3_Color_Flur

---- End of registry key query ---------------------------
As you can see, the output has been optimized for human readability. That can be changed with the command line option -c which enables CSV output.
Putting New Icons on the Desktop
Putting new icons on each user’s desktop can be as easy as running Profile Nurse with this INI file:
[GeneralSettings]
UserProfileDir="e:\profiles\<PROFILE_DIR>"

[FileSystemCopyFile]
SourcePath="c:\SomeIcon.lnk"
DestinationPath="desktop\SomeIcon.lnk"
Save above INI file as NewIcons.ini and start Profile Nurse like this:
ProfileNurse -i NewIcons.ini -v
Profile Migration
USMT
Microsoft’s User State Migration Tool is a powerful and free tool that migrates user data and settings between Windows PCs. It can do a lot, but customizing it can be a little tedious because it involves manual editing of XML configuration files, something you do not have to do with a commercial product like sepago’s Profile Migrator.
I have assembled the relevant information for getting you started with USMT here, a more in-depth article covers additional details.
Preparation
USMT 4 is contained in the massive Windows Automated Installation Kit (AIK). Download and extract the tool. Then download and extract the hotfix KB2023591 which adds support for Office 2010. Once you have all the bits I recommend you create a directory structure like the following:

The folder “Apps” contains the USMT, “Config” customized migration rules, “Logs” the tools’ log files and “Store” is where we make USMT put the data it reads from the source computer. Share the base folder USMT on the network. And, while copying the files into this structure, make sure to copy the subfolders DlManifests and ReplacementManifests, too!
Source Computer
In this example I assume we are migrating a 32-bit Windows XP computer to 64-bit Windows 7. We want to migrate all user settings (i.e. the relevant configuration stored in the profiles) as well as all data stored in a known location, C:\Data, with the exception of MP3 files. For the data migration we need a custom migration rule which looks like this:
<migration urlid="http://www.microsoft.com/migration/1.0/migxmlext/HK_Userdata">
  <component type="Documents" context="System">
    <displayName>Documents from C:\Data excluding MP3 files</displayName>
    <role role="Data">
      <rules>
        <include>
          <objectSet>
            <pattern type="File">C:\Data\* [*]</pattern>
          </objectSet>
        </include>
        <exclude>
          <objectSet>
            <pattern type="File">C:\Data\* [*.mp3]</pattern>
          </objectSet>
        </exclude>
      </rules>
    </role>
  </component>
</migration>
We store that rule in a file called “hk_userdata.xml” in the Config folder of our directory structure above.
On the XP machine log on as administrator and map a drive letter to the migration share:
net use z: \\192.168.175.1\usmt
cd /d z:\apps\x86
Then run USMT’s scanstate tool to backup data and settings from the XP computer into the binary file “Z:\Store\USMT\USMT.mig”.
scanstate z:\store /i:migapp.xml /i:miguser.xml /i:z:\config\hk_userdata.xml /o /v:13 /uel:30 /l:z:\logs\scanstate.log
Migapp.xml and Miguser.xml are the default migration rules included with the USMT for application and user profile migration, respectively. “/v:13” enables verbose logging while “/uel:30” excludes all user profiles that have not been used in the past 30 days.
Target Computer
Again, connect a drive to the migration share, but this time cd into the 64-bit tool directory:
net use z: \\192.168.175.1\usmt
cd /d z:\apps\x64
As on XP, this must happen in an administrator session (and from an elevated command prompt). Now loadstate can restore what scanstate saved earlier:
loadstate z:\store /i:migapp.xml /i:miguser.xml /i:z:\config\hk_userdata.xml /v:13 /UE:*\administrator /l:z:\logs\loadstate.log /lac /lae
“/UE:” excludes specific users (it can be specified more than once), /lac (local account create) adds missing local accounts and disables them unless /lae (local account enable) is also used. If an initial password is required specify it with /lac:password.
Alternatives
There are not free alternatives to USMT of relevance, but a couple of commercial products. Having worked on it myself I’ll just mention sepago’s Profile Migrator here, which not only migrates between clients, but also from clients to the cloud (in other words: from decentralized to centralized systems) and between systems in the data center (i.e. roaming profiles). Profile Migrator comes with a friendly UI and a powerful tool to facilitate the creation of custom migration rules.
Deleting User Profiles
Incorrectly deleting user profiles is easy: just remove the directory from the disk. Windows (7) will thank you for that the next time you log on by giving you a temporary profile and making it very clear that it is not amused at all.
Better do the deleting correctly. A handy tool that helps you with that is Delprof2, my successor to Microsoft’s Delprof which is not compatible with anything newer than Windows XP.
Here are some examples of what Delprof2 can do:
Delete all locally cached roaming profiles:
Delprof2 -r
Delete all locally cached roaming profiles on computer srv3:
Delprof2 -r -c:srv3
Delete all locally cached roaming profiles on computer srv3 in quiet mode (not asking for confirmation) and continue even if errors occur:
Delprof2 -r -c:srv3 -q -i
Delete only profiles that have not been used for at least 30 days:
Delprof2 -d:30
Delete only profiles that have not been used for at least 30 days - list only mode, nothing is actually deleted:
Delprof2 -d:30 -l
Delete all inactive profiles on the local computer (all profiles except the current user’s profile and “special” profiles used by the OS), asking for confirmation before each delete:
Delprof2 -p
Citrix Profile Management
Also known as UPM (User Profile Manager).
Configuration
This is a step by step description of how to configure Citrix Profile Management in a typical environment.
Preparation
- Download the latest installation package from My Citrix. Its main contents are two MSI files (one for 32-bit Windows, another for 64-bit Windows) and the administrative templates (ADM files) for configuration via group policy.
Client (Agent) Installation
- Install the software on all computers where profiles are to be managed by Citrix. This typically comprises clients and terminalservers but does not include infrastructure servers such as domain controllers or file servers. To facilitate deployment the profile management service initially is inactive even when started, making it safe to first deploy the service without interruption daily operations.
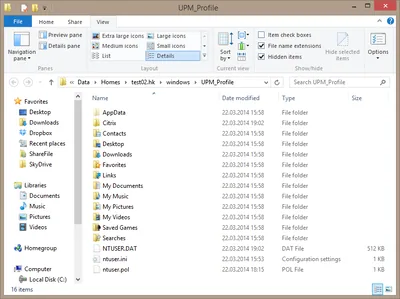
- Profile Management comes with INI files containing a recommended sample configuration. These INI files are copied to the installation directory (%ProgramFiles%\Citrix\User Profile Manager) and should be renamed unless configuration via group policy is not desired. Do not delete the INI files, rename them instead and keep them as a reference. On V2 profile platforms (Vista and newer) the INI file is called UPMPolicyDefaults_V2Profile_all.ini whereas on V1 profile platforms (XP and Server 2003) it is called UPMPolicyDefaults_V1Profile_lang.ini.
- Reboot the computer when finished.
Configuration via Group Policy
- Create a OU structure that allows you to apply a base configuration to all computers running Profile Management, but that also separates computers by type (client, terminal server) and platform (Windows XP, Windows 7). Such a structure gives you maximum flexibility for configuring the product. Here is an example:

UPM OU structure - Create and link a group policy object (GPO) to the base of your OU structure. We use this GPO to configure all those aspects of the product that are independent of operating system and platform. Name the GPO according to you standards, e.g. “Citrix Profile Management base configuration”.
- Disable user policy processing of the new GPO. Citrix Profile Management is configured by computer policy settings only, and disabling the user part of a GPO speeds up logon processing a tiny little bit.
- Edit the new GPO and navigate to “Computer Configuration” -> “Administrative Templates” -> “Classic Administrative Templates (ADM)” -> Citrix -> Profile Management
- Enable “Enable Profile Management”
- If you are conducting a pilot, enable “Processed groups” and add the user groups that should be processed by Profile Management. By default are users are processed with the exception of administrators.
- Enable “Active write back” to have Profile Management write changed files back to the user store as soon as the corresponding file handle is closed.
- Navigate to the folder “Profile handling”
- On terminal servers or other stateless machines enable “Delete locally cached profiles on logoff”
- Navigate to the folder “Log settings”
- Enable “Enable logging”
- Enable “Log settings” and tick all log categories. This makes the profile management service write very detailed status information to a log file located in %SystemRoot%\System32\LogFiles\UserProfileManager. This log file is a great source for troubleshooting information. Once Profile Management is working smoothly you may reduce the log level.
- Enable “Maximum size of the log file” and set the size to 10485760 (10 MB).
- Navigate to the folder “Registry”
- Enable “Exclusion list” and add the following to the list:
- Software\Microsoft\Windows\CurrentVersion\Explorer\TrayNotify
- Navigate to the folder “File system”
- Enable “Exclusion list - directories” and add the following entries if you need to configure English V1 profile machines (XP/2003):
- Application Data\Citrix\PNAgent\AppCache
- Application Data\Citrix\PNAgent\Icon Cache
- Application Data\Citrix\PNAgent\ResourceCache
- Application Data\ICAClient\Cache
- Application Data\Sun\Java\Deployment\cache
- Application Data\Sun\Java\Deployment\log
- Application Data\Sun\Java\Deployment\tmp
- Application Data\Macromedia\Flash Player#SharedObjects
- Application Data\Macromedia\Flash Player\macromedia.com\support\flashplayer\sys
- Local Settings
- Start Menu
- For German V1 profile machines replace “Application Data” with Anwendungsdaten and “Local Settings” with “Lokale Einstellungen”. For other OS languages translate appropriately. You can add entries for multiple languages.
- Add the following entries to configure V2 profile machines (Vista and newer). These entries need not be localized:
- $Recycle.Bin
- AppData\Local
- AppData\LocalLow
- AppData\Roaming\Citrix\PNAgent\AppCache
- AppData\Roaming\Citrix\PNAgent\Icon Cache
- AppData\Roaming\Citrix\PNAgent\ResourceCache
- AppData\Roaming\ICAClient\Cache
- AppData\Roaming\Macromedia\Flash Player#SharedObjects
- AppData\Roaming\Macromedia\Flash Player\macromedia.com\support\flashplayer\sys
- AppData\Roaming\Microsoft\Windows\Start Menu
- AppData\Roaming\Sun\Java\Deployment\cache
- AppData\Roaming\Sun\Java\Deployment\log
- AppData\Roaming\Sun\Java\Deployment\tmp
- Navigate to the subfolder “Synchronization”
- Enable “Directories to synchronize” and add the following entries to the list. As before, adapt the following V2 profile paths to your localized V1 profiles if required:
- AppData\Local\Microsoft\Credentials
- AppData\Local\Citrix\RadeCache
- Enable “Files to synchronize” and add the following entries to the list. As before, adapt the following V2 profile paths to your localized V1 profiles if required:
- AppData\Local\Microsoft\Office*.qat
- Navigate to the folder “Streamed user profiles”
- Enable “Profile streaming” to speed up logons by asynchronously copying the files from the user store (file server) to the local disk during logon
- Enable “Always cache” and leave the settings “Cache files this size or larger” at the default of zero
- Enable “Timeout for pending area lock files” and set the value to three (days)
- Create and link a group policy object (GPO) to the OU that contains V2 profile computers (Vista/Windows 7/Server 2008 (R2)). We use this GPO to set the path to the user store (the network profile path).
- Disable user policy processing of the new GPO. Citrix Profile Management is configured by computer policy settings only, and disabling the user part of a GPO speeds up logon processing a tiny little bit.
- Edit the new GPO and navigate to “Computer Configuration” -> “Administrative Templates” -> “Classic Administrative Templates (ADM)” -> Citrix -> Profile Management
- Enable “Path to user store” and enter the path to a profile share followed by the variablized user name, e.g.: \server\CitrixProfiles%Username%.%Userdomain%.V2
- Repeat the process and create a new GPO for each plaform where you want to or need to use individual user profiles. Typically at least one profile for V1 computers and another profile for V2 computers is used.
- Log on and check that Profile Management is working. You may need to update the group policy configuration for you latest changes to apply.
Further Reading
I have written a lot more about user profiles than this. Check out the other 30+ articles.


Comments