Faster Trimming & Compacting of Hyper-V Ubuntu VMs
A while ago I described how to compact an Ubuntu VHDX running on Hyper-V using the sfill command. Running sfill, however, can take hours. Luckily, there is a much faster alternative.
Ubuntu Trim and Hyper-V
Ubuntu running in a Hyper-V virtual machine has been supporting the trim command since version 14.04 (details). The OS issues trim commands when files are deleted to tell the disk that the blocks occupied by the files can be used elsewhere.
This mechanism originally developed for SSDs is useful for virtual hard disks, too. The host OS (the hypervisor) cannot know when blocks are ready to be reused unless the VM tells it. That is exactly what the trim command is for!
Trimming from Inside the Ubuntu VM with Fstrim
To tell the hypervisor which blocks can be reused issue the following command:
sudo fstrim -v /
This should not take too long.
Compacting the Ubuntu VM’s Virtual Hard Disk (VHDX)
To actually free the space you got back from the trim command above you need to shut down the Ubuntu VM. Then run the following PowerShell code on the Hyper-V machine hosting the Ubuntu VM:
gci -File -Filter *.vhd* -Path D:\VMs -Recurse | % {Mount-VHD $_.FullName -ReadOnly; Optimize-VHD $_.FullName -Mode full; Dismount-VHD $_.FullName}
This should not take too long, either. It recursively searches a base path (D:\VMs) and optimizes each VHD or VHDX file it finds. Adjust the base path as needed.
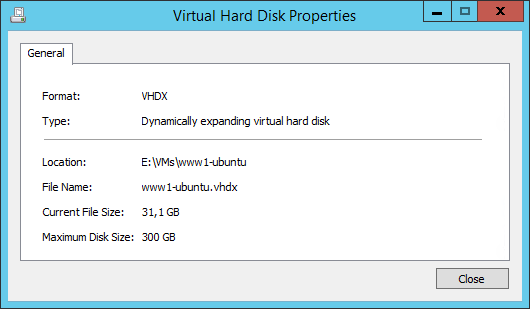
That’s it – enjoy the freed disk space! In my case, the size of the VHDX was reduced from 103 to 31 GB. Not bad for a few minutes of work (and downtime).