Compacting Hyper-V VHDX Files of Ubuntu Linux VMs
Note: if your guest OS supports the trim command you can use the faster method described in this article.
If you configured your Hyper-V virtual machines with dynamically expanding virtual disks you will find that the VHDX files backing the virtual disks always grow in size, they never shrink. Eventually this becomes a problem either directly because of increased storage requirements or indirectly because backups take longer. Compacting VHDX files is possible but more complicated than I feel it should be. I have described the process for Windows VMs here. This article shows how to do it for Ubuntu Linux VMs.
Assessment
I am describing the process of reducing virtual hard disk size using our Ubuntu web server VM as an example. I distinctly remember that the VHDX size was approximately 24 GB when I installed the machine about 1.5 years ago. Let’s take a look at the current size:
PS C:\> dir 'D:\VMs\www1-ubuntu\Virtual Hard Disks'

    Directory: D:\VMs\www1-ubuntu\Virtual Hard Disks

Mode   LastWriteTime       Length         Name
----   -------------       ------         ----
-a---  29.11.2015 00:20    60704161792    www1-ubuntu.vhdx
Wow, that’s a whopping 60 GB! The VHDX’ size more than doubled! Let’s see what we can do about that.
Of course, you can get the same information from Hyper-V Manager’s GUI, too, by inspecting the virtual hard drive:
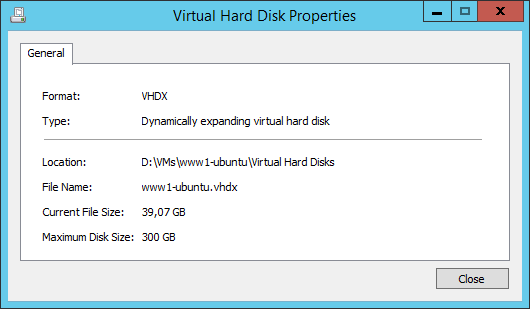
(Above screenshot was taken at a later time, thus the different size)
Preparation
The key to success is to zero all deleted blocks on the disk. For performance reasons the OS does not do that but simply marks those blocks as deleted, keeping the actual data as it is. But we can politely convince Linux to fill all deleted blocks with nulls using the following commands:
sudo apt-get install secure-delete

cd /

# This may take hours
sudo sfill -llz .

sudo shutdown -h now
Unfortunately the VM needs to be shut down for the size reduction. So no quick online no-downtime operation. Rather a lengthy service not available kind of thing.
Action
The actual size reduction of the VHDX file(s) is performed on the Windows host command line as follows:
PS C:\> gci -File -Filter *.vhd* -Path D:\VMs -Recurse | % {Mount-VHD $_.FullName -ReadOnly; Optimize-VHD $_.FullName -Mode full; Dismount-VHD $_.FullName}
The PowerShell command line above processes all VHDX files below a given base directory (D:\VMs), mounts each file read-only, compacts it and dismounts it.
Result
Let’s take a look at the result:
PS C:\> dir 'D:\VMs\www1-ubuntu\Virtual Hard Disks'

    Directory: D:\VMs\www1-ubuntu\Virtual Hard Disks

Mode   LastWriteTime       Length         Name
----   -------------       ------         ----
-a---  29.11.2015 13:25    24868028416    www1-ubuntu.vhdx
Not bad, from 60 GB down to 24 GB!


4 Comments
Thanks for this – it’s been tough finding a simple solution. After I did this, I used Gparted Live CD to resize the partition of a vhd that I made too large.
i used sfill -fllz .
same result but 1000 times faster
i’ve noticed that when sfill is running that a checkpoint is created for the ubuntu guest VM that equals approx the same size of the drive space that will ultimately be cleaned out (deleted) after the compact step. My question is if the checkpoint tree needs to be deleted prior to running the compact step or not? (for example, if you use the hyper-v UI to compact the disk it requires you to remove checkpoints prior before it gives you the edit button required to reach the “compact” step via the UI) Should I be deleting checkpoints via the UI prior to running the compact powershell line that you have provided above?
I am trying this process on 400GB VHDX.
Looking forward to the result :D