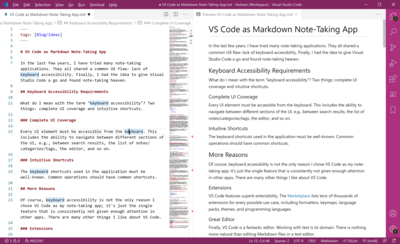
VS Code as Markdown Note-Taking App
- Applications
- Published Oct 20, 2020 Updated Jan 4, 2026
In the last few years, I have tried many note-taking applications. They all shared a common UX flaw: lack of keyboard accessibility. Finally, I had the idea to give Visual Studio Code a go and found note-taking heaven.
Keyboard Accessibility Requirements
What do I mean with the term “keyboard accessibility”? Two things: complete UI coverage and intuitive shortcuts.
Complete UI Coverage
Every UI element must be accessible from the keyboard. This includes the ability to navigate between different sections of the UI, e.g., between search results, the list of notes/categories/tags, the editor, and so on.
Intuitive Shortcuts
The keyboard shortcuts used in the application must be well-known. Common operations should have common shortcuts.
More Reasons
Of course, keyboard accessibility is not the only reason I chose VS Code as my note-taking app, it’s just the single feature that is consistently not given enough attention in other apps. There are many other things I like about VS code.
Extensions
VS Code features superb extensibility. The Marketplace lists tens of thousands of extensions for every possible use case, including formatters, keymaps, language packs, themes, and programming languages.
Great Editor
Finally, VS Code is a fantastic editor. Working with text is its domain. There is nothing more natural than editing markdown files in a text editor.
What About Cloud Sync & Encryption?
Initially, I was looking for the jack of all trades note-taking app. One app to rule them all, a single tool that provides all the functionality I would ever need. Only slowly did I realize this wonder-app does not exist. However, that is not necessarily a problem, as non-essential features can easily be “outsourced.” This includes (encrypted) cloud synchronization: simply store your note files in a directory that being is synchronized to your cloud of choice.
Getting Started
There is not really much to prepare, but it is a good idea to create what VS Code calls a workspace for your Markdown notes. Create a base folder for all your notes, e.g., D:\Data\Notes with an MD subdirectory. If you already have notes in Markdown format, copy them to the MD directory.
In VS Code, open the base folder D:\Data\Notes you just created (File > Open Folder) and save as a workspace in the same directory. You should now have a file D:\Data\Notes\Notes.code-workspace.
A hierarchical view of your notes is available in Explorer (Ctrl+Shift+E). To exclude the .vscode directory, open settings (Ctrl+,), navigate to Files: Exclude and add **/.vscode to the list of exclusions.
Creating a New Note
To create a new note, press Ctrl+N to new editor tab. To specify the file name and location on disk, press Ctrl+S to invoke the operating system’s file save dialog. Make sure to append the .MD extension (the default is .TXT).
For an alternative workflow, check out the extension Advanced New File.
Recommended Extensions
Markdown Extended
Working With Tables
The Markdown Extended extension adds missing commands for working with tables:
- table formatting
- adding, deleting and moving table columns
Formatting Shortcuts, Exporters
In addition to facilitating table handling, Markdown Extended provides well-known formatting shortcuts, e.g., bold (Ctrl+B), or italic (Ctrl+I), adds WYSIWYG exporters to PDF, PNG, and HTML, and supports extended markdown syntax (e.g., checkboxes).
Table of Content
To add a table of content to a document, place a [[TOC]] shortcut where you want the table of content to be inserted.
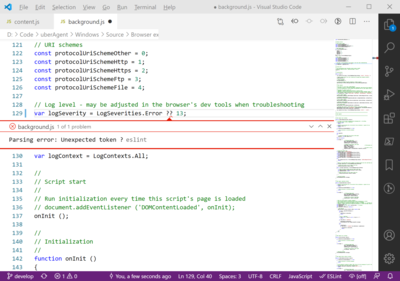
Markdown Lint (Syntax Check and Fix)
The markdownlint plugin underlines sections that violate formatting rules. When you navigate to such a highlighted section and press Ctrl+. a pop-up offers a handy automatic fix as well as a link to the rule’s documentation.
You may find that some rules collide with your habits. To disable individual rules, open your user settings JSON file and add a section like the following (details):
"markdownlint.config":
{
   "MD024": false,
   "MD026":
   {
      "punctuation": ".,;:!"
   },
      "MD034": false
}
Spell-Checking (Including Grammarly)
As a paying Grammarly user, I like to have access to my spell-checking service in every application where I edit text. Unfortunately, there is no official Grammarly extension for VS Code. This unofficial extension looks good but seems to be actively blocked by Grammarly so that paying users cannot log in (issue).
Spell Right is a decent alternative that cleverly uses the operating system’s dictionary (if one is available, i.e., on Windows 10 and macOS). After installing it navigate to its settings by pressing Ctrl+Shift+P and search for @ext:ban.spellright. Then verify it is enabled for the document types you are editing (e.g., Markdown). The extension supports multiple languages per document (view and change next to the eye symbol in the status bar or via SpellRight: Select Dictionary (Language) in the command palette). By deselecting all languages you disable spell-checking for the current document.
Dealing with spelling errors is easy: navigate the cursor to the misspelled word and press Ctrl+.. To disable spell-checking for a single markdown document add the following YAML header:
---
spellcheck: off
---
Identifying Multiple Windows
You may find yourself working with more than one VS Code window. You might use one for editing Markdown while working on a development project in another.
Peacock helps you identify which is which by subtly and cleverly coloring each window differently.
Tags
If you like to organize your notes with tags, vscode-nested-tags is a must. It adds a tag tree to Explorer that allows you to navigate your notes independent of the file system structure. Tags are typically stored with each document as part of the YAML header, e.g.:
---
tags: [Tag1, AnotherTag, Hierarchy/Level2/Level3]
---
Clean HTML Export for WordPress
There are two very different use cases for a conversion/export routine from Markdown to HTML. One is about displaying the HTML as-is; this requires nice formatting embedded in the HTML code. The other is centered on publishing to a CMS like WordPress that has its own CSS styles. In this latter case, the exported HTML must be “clean,” i.e., it must not contain any formatting, styling, CSS, or scripts.
VS Code natively supports the conversion of a Markdown document to HTML. In addition to that, many extensions come with their Markdown to HTML export capability. All of them generate HTML you definitely don’t want to use with a CMS. The HTML code is littered with tags and styles that, in the best of cases, “only” bloat the code, but in practice probably mess up the formatting quite nicely.
Pandoc to the Rescue
Pandoc is a stand-alone tool for converting between markup and word processing formats, as well as for generating PDF output. Pandoc supports Markdown, HTML and many other input formats.
Installation
There is a VS Code extension for Pandoc, but it only makes the tool easily accessible from within VS Code. Pandoc needs to be installed, too. Follow these steps for HTML output via Pandoc:
- Install Pandoc
- Restart VS Code
- Install the vscode-pandoc extension
Cleaning the HTML Output
By default, Pandoc adds attributes like id to the HTML output. We can get rid of those with a LUA filter I found here. To set this up:
- Create a data directory for Pandoc, e.g.,
D:\Data\Pandoc - Create a
filterssubdirectory, e.g.,D:\Data\Pandoc\filters - Create a file
remove-attributes.luain thefiltersdirectory and paste the contents below - In VS Code’s settings, search for
pandocand paste the following asPandoc: HTML Opt String:--data-dir="D:\Data\Pandoc" --lua-filter=remove-attributes.lua
Content of the Pandoc script remove-attributes.lua:
function remove_attr (x)
  if x.attr then
    x.attr = pandoc.Attr()
    return x
  end
end

return {{Inline = remove_attr, Block = remove_attr}}
Converting Markdown to HTML
With the above setup in place, we can convert Markdown to clean HTML from VS Code easily.
- Open the command palette (
Ctrl+Shift+P) and selectPandoc Render(or use the shortcutCtrl+K P). - A popup lets you choose between the output formats PDF, DOCX, and HTML. Select HTML.
Manual Finishing Touches
Even though the generated HTML is pretty clean, I found a few points where additional manual corrections were warranted:
- HREFs: I like to add
target="_blank"to most links - Code block quotes: in the generated HTML quotes were replaced by
"which I changed back to" - Code block syntax highlighting: language specifiers like
```JSONwere removed in the conversion. I added them back in as follows:<code class="lang-json">
Useful Keyboard Shortcuts
- Open a preview in a new tab:
Ctrl+Shift+V - Open a preview in a new editor group side-by-side:
Ctrl+K V - Switch to editor group 1, 2, etc.:
Ctrl+1,Ctrl+2, etc. - Open the command palette:
Ctrl+Shift+P - Open recently used files and workspaces:
Ctrl+R - Switch to Explorer in the sidebar:
Ctrl+Shift+E - Navigate from the search text to the search results:
Ctrl+DOWN - Quick-open files:
Ctrl+P
Other Note-Taking Apps I Tried
As I mentioned above, I have tried many note-taking applications before settling on VS Code. Here is an incomplete list:
- OneNote 2016
- Standard Notes (see my blog article)
- Inkdrop
- Notable
Resources
- Markdown and Visual Studio Code
- Getting Started Tips and Tricks (highly recommended)


Comments