How to Reduce Bandwidth Usage and Optimize Website Performance with W3 Total Cache and Amazon CloudFront
- Website
- Published Sep 5, 2011 Updated Oct 3, 2011
My website is hosted by Rochen, a company whose services I am very happy with. For reasons I understand they do not offer unlimited data transfer. My account, for example, comes with 50 GB per month. That is a lot and enough for most sites, including mine at this point in time. But I am selling software, and if a big news site writes about SetACL Studio the least of all things I want to happen is that Rochen suspends my account because the transfer limit has been reached.
Scale Up or Scale Out
There are two possible solutions; three actually, but I do not want to change the hosting company. Of the two remaining solutions, scaling up is unattractive because moving to a bigger plan with a significantly higher transfer limit is very expensive. We are talking more than 10x here.
But there is an alternative, and it is very attractive: scaling out by moving data to a content delivery network (CDN). I chose Amazon’s CloudFront without comparing offerings too much because it is simple to use and inexpensive. Its price calculator predicted a monthly bill of $ 10.70 for 50 GB of transfer volume:

Hot to Get Your Files Into the Cloud
When thinking about using a content delivery network one question comes up early: how to get my files into the network and how to do that in such a way that changes are reflected automatically? After all, when I update my Wordpress theme I do not want to be bothered with uploading new or changed files to the cloud. And when I add or change an image in a blog post the new image needs to find its way into the cloud without manual interaction.
Luckily, that problem has been solved. The method commonly used is called “origin pull” and works like this: whenever an object is requested the CDN has not cached yet, it downloads it from the source (my web site). The next time that object is requested, the CDN can serve it from its cache.
Implementation
Given the right tools, implementing origin pull with Amazon CloudFront and Wordpress is simple. Here is what I did:
First I installed the plugin W3 Total Cache. I recommend you do this even if you do not plan to use a CDN since it greatly improves your site’s performance by minifying JavaScript and HTML and combining multiple .JS files into one.
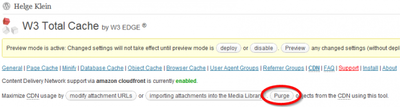
Setting up a CDN is simple with W3 Total Cache: on the “General” page enable “CDN” and select “Amazon CloudFront” from the Combobox. Make sure to select the item below “Origin Pull”; with “Origin Push” you would have to upload your content to Amazon S3 manually.

Then I moved to the “CDN” page of the plugin and entered my Amazon access key ID and secret key. With that information, W3 Total Cache can create the “distribution” in CloudFront. In Amazon’s AWS management console that looks like this:

Next I created 10 CNAMEs in DNS all pointing to the new CloudFront distribution:

Creating many CNAMEs potentially improves page load times because more objects can be loaded in parallel. I added the newly created CNAMEs to the CDN configuration and to the properties of the CloudFront distribution.
With all items in place I could test the setup by clicking “Test CloudFront Distribution”. The result was encouraging:

After previewing the new configuration I deployed it in W3 Total Cache. Practically all static content on helgeklein.com is now served from a server near you - this keeps my hosting costs down and improves the site’s performance for visitors from around the world. Sounds like a win-win!
The Result
With the described optimizations in place Webpagetest’s score of a typical page on my site is near perfect:

The Cost
Here are some numbers from my first monthly bill:
Data transfer out: about 10 GB
HTTP requests: 320,000
Total charges: $1.94
I am very happy with that.


Comments