Elasticsearch: Simple Docker Compose Setup for Home Servers
- Home Automation, Networking & Self-Hosting
- Published Apr 26, 2025 Updated Oct 23, 2025
This is a deliberately simplistic dockerized Elasticsearch & Kibana setup focused on long-term stability and minimal maintenance requirements. To forego the need to deal with a private CA and certificates, Elasticsearch TLS is not used. Instead, authenticated HTTPS access is provided via Caddy.
This post is part of my series on home automation, networking & self-hosting that shows how to install, configure, and run a home server & network with dockerized or virtualized services.
Architecture
Larger Elasticsearch production setups consist of multiple Elasticsearch hosts in a cluster whose nodes communicate with each other and with clients such as Kibana via TLS-encryption. We don’t need all of that overhead and complexity.
Instead, we’re setting up a single-node Elasticsearch & Kibana system in two connected Docker containers. We disable security altogether because managing self-signed TLS certificates can be a royal pain. Unfortunately, doing so disables authentication, too, but we can live with that since we’re using Caddy for automatic HTTPS and user authentication instead.
We’re using the free (“basic”) version of Elasticsearch, which comes with an impressive feature set. As for the Docker image, we’re using the official one (docs).
Elasticsearch Installation
Preparation
I’m assuming that you’ve set up Docker and the Caddy container as described in the previous articles in this series.
Dockerized Elasticsearch Directory Structure
This is what the directory structure will look like when we’re done:
rpool/
 └── encrypted/
     └── docker/
         └── elasticsearch/
             ├── data
                 ├── elastic1
                 └── kibana
             ├── .env
             ├── container-vars-elastic.env
             ├── container-vars-kibana.env
             └── docker-compose.yml
We’re placing the configuration on the encrypted ZFS dataset (rpool/encrypted).
Create the new directories and set ownership of the directories to user/group ID 1000, which are used by the dockerized application:
mkdir -p /rpool/encrypted/docker/elasticsearch/data/elastic1
mkdir -p /rpool/encrypted/docker/elasticsearch/data/kibana

chown -Rfv 1000:1000 /rpool/encrypted/docker/elasticsearch/data
Elasticsearch Docker Compose File
Create docker-compose.yml with the following content:
services:

  elastic1:
    container_name: elastic1
    hostname: elastic1
    image: docker.elastic.co/elasticsearch/elasticsearch:${ELASTIC_VERSION}
    restart: unless-stopped
    networks:
      - caddy_caddynet     # frontend communications
    expose:
      - 9200               # data ingestion (HTTP)
    volumes:
      - /etc/localtime:/etc/localtime:ro
      - ./data/elastic1:/usr/share/elasticsearch/data
    mem_limit: 1g
    ulimits:
      memlock:
        soft: -1
        hard: -1
    env_file:
      - container-vars-elastic.env
    healthcheck:
      test:
        [
          "CMD-SHELL",
          "curl -s http://localhost:9200 | grep -q 'cluster_name'",
        ]
      interval: 10s
      timeout: 10s
      retries: 120

  kibana1:
    container_name: kibana1
    hostname: kibana1
    image: docker.elastic.co/kibana/kibana:${ELASTIC_VERSION}
    restart: unless-stopped
    networks:
      - caddy_caddynet     # frontend communications
    expose:
      - 5601               # Web UI (HTTP)
    volumes:
      - /etc/localtime:/etc/localtime:ro
      - ./data/kibana:/usr/share/kibana/data
    mem_limit: 1g
    env_file:
      - container-vars-kibana.env
    depends_on:
      elastic1:
        condition: service_healthy
    healthcheck:
      test:
        [
          "CMD-SHELL",
          "curl -s -I http://localhost:5601 | grep -q 'HTTP/1.1 302 Found'",
        ]
      interval: 10s
      timeout: 10s
      retries: 120

networks:
  caddy_caddynet:
    external: true
Note: Setting container memory limits is recommended to prevent Elasticsearch to use up all the host’s RAM.
Environment Variable File .env
Create the file .env with the following content:
ELASTIC_VERSION=9.2.0
Note: Elastic requires full version numbers like 9.2.0 (they don’t set Docker tags like 9 or 9.2).
Environment Variable File container-vars-elastic.env
Create the file container-vars-elastic.env with the following content:
cluster.name=Elastic1
discovery.type=single-node

# Send JVM GC debug logs to standard error
ES_JAVA_OPTS=-Xlog:disable -Xlog:all=warning:stderr:utctime,level,tags -Xlog:gc=debug:stderr:utctime

# Disable Xpack security because it requires transport SSL to be enabled, too
xpack.security.enabled=false
Environment Variable File container-vars-kibana.env
Create the file container-vars-kibana.env with the following content:
# How Kibana accesses Elasticsearch
ELASTICSEARCH_HOSTS=http://elastic1:9200

# How users access Kibana (through the Caddy reverse proxy)
SERVER_PUBLICBASEURL=https://kibana.home.yourdomain.com

XPACK.SECURITY.ENABLED=false
XPACK_SECURITY_ENCRYPTIONKEY=YOUR_KEY_1
XPACK_REPORTING_ENCRYPTIONKEY=YOUR_KEY_2
XPACK_ENCRYPTEDSAVEDOBJECTS_ENCRYPTIONKEY=YOUR_KEY_3

# Disable telemetry
TELEMETRY_OPTIN=false
Replace YOUR_KEY_n with secrets you generate by running the following command:
tr -cd '[:alnum:]' < /dev/urandom | fold -w "32" | head -n 1
Start the Elasticsearch & Kibana Containers
Navigate into the directory with docker-compose.yml and run:
docker compose up -d
Inspect the container logs for errors with the command docker compose logs --tail 100 --timestamps.
Let’s Encrypt Certificate for Elasticsearch & Kibana via Caddy
Caddyfile
Add the following to Caddyfile (details):
elastic1.{$MY_DOMAIN} {
	# Don't require authentication from the subnet Home Assistant is on (unauthenticated ingest)
	import auth not remote_ip 10.0.5.0/24
	reverse_proxy elastic1:9200
	tls {
		dns cloudflare {env.CLOUDFLARE_API_TOKEN}
	}
}
kibana.{$MY_DOMAIN} {
	import auth
	reverse_proxy kibana1:5601
	tls {
		dns cloudflare {env.CLOUDFLARE_API_TOKEN}
	}
}
Note: the definition of the auth snippet can be found here.
DNS A Records
Add the following A records to your DNS domain (details):
elastic1.home.yourdomain.com 192.168.0.4     # replace with your Docker host's IP address
kibana.home.yourdomain.com 192.168.0.4       # replace with your Docker host's IP address
Try to resolve the name on a machine in your network (e.g., nslookup elastic1.home.yourdomain.com).
Reload Caddy’s Configuration
Instruct Caddy to reload its configuration by running:
docker exec -w /etc/caddy caddy caddy reload
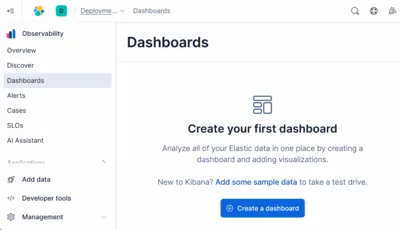
You should now be able to access Kibana at https://kibana.home.yourdomain.com without getting a certificate warning from your browser.


Comments