OPNsense HowTo: IPv4 & IPv6 Internet Connectivity With FTTH Modem
- Home Automation, Networking & Self-Hosting
- Published Sep 14, 2024
This article explains how to configure OPNsense as your (only) internet router in a fiber to the home (FTTH) setup. This post is part of my series on home automation, networking & self-hosting that shows how to install, configure, and run a home server & network with dockerized or virtualized services.

My Setup
Provider Hardware: ONT/Modem
I have fiber to the home (FTTH) internet connectivity via our local provider NetCologne. Their handover point is a combined ONT/modem, the Genexis FiberTwist G2120B. It comes with Ethernet and TV (coax) ports.
My Hardware: OPNsense Router
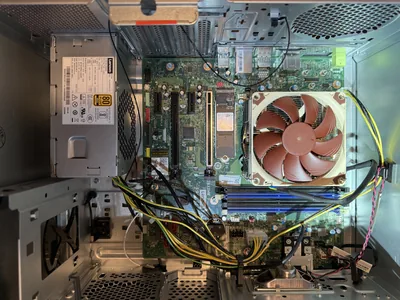
My router/firewall is a Protectli VP2420 running OPNsense. The VP2420 has four 2.5G Ethernet ports, one of which (the WAN port) is connected to NetCologne’s Genexis ONT.
OPNsense Behind Another Router?
At first, I placed the OPNsense box behind another router, a FRITZ!Box. In Germany, these are so popular that I didn’t even think about whether it was actually necessary. I did, however, want to avoid double NAT, a scenario where two cascaded routers each perform network address translation.
Avoiding double NAT does not mean that OPNsense cannot be placed behind other routers - it can. But if you do place OPNsense behind a FRITZ!Box, for example, you should make sure that the other router operates in bridge mode. Unfortunately, that is something a FRITZ!Box cannot do; bridge mode is not available.
As an alternative to bridge mode, a FRITZ!Box offers an exposed host configuration (docs) in which all incoming connections are passed on to the exposed host, which would be the OPNsense machine.
In my testing, I found that while configuring OPNsense as a FRITZ!Box exposed host works well for IPv4, it creates various issues with IPv6.
Thinking about it some more, I realized that the FRITZ!Box (or any alternative secondary router) is unnecessary and can be removed from the setup without any loss in functionality or security. OPNsense is not only adequate as a router and firewall; having fewer components is also architecturally much “cleaner” and consumes less energy.
OPNsense Configuration
This section summarizes how to configure OPNsense as the primary router for an FTTH internet connection behind an ONT/modem.
WAN Interface
We don’t need or want IP addresses on the link to the ONT/modem. Configure the WAN interface as follows:
- IPv4 Configuration Type: none
- IPv6 Configuration Type: none
VLANs for Data, Voice, etc.
Many ISPs segment or prioritize voice, data, and/or multimedia traffic with VLANs. NetCologne uses VLAN 10 for data and VLAN 20 for voice. Create a VLAN 10 for data with the following properties:
- Device:
vlan0.10 - Parent: the WAN interface
- VLAN tag:
10 - Description:
VLAN_10_WAN_DATA
PPPoE as Dial-Up Connection
PPPoE is used to actually connect to and authenticate against the ISP. Create a point-to-point device with the following properties:
- Link type:
PPPoE - Link interface:
vlan0.10(created above) - Description: your ISP’s name, for example
- Username: your ISP username (in the case of NetCologne: nc-xxx@netcologne.de)
- Password: your ISP password
Interface Assignment
Create an interface assignment for the PPPoE device with the following properties:
- Enable: checked
- Description:
WAN_10_DATA - IPv4 Configuration Type:
PPPoE - IPv6 Configuration Type:
DHCPv6 - DHCPv6 client configuration:
- Use IPv4 connectivity: checked
- Prefix delegation size: 48 (needs to match what is provided by your ISP; often 48 or 56)
- Request prefix only: unchecked
- Send prefix hint: checked
LAN and User VLAN Configuration
Configure the following in your LAN and/or user VLANs:
- IPv4 Configuration Type:
Static IPv4- Details not covered in this article
- IPv6 Configuration Type:
Track interface- Parent interface:
WAN_10_DATA - Assign prefix ID: use one single-digit ID per VLAN
- Parent interface:
DHCP
- IPv4: Configure DHCP (not covered here).
- IPv6: Router advertisements are sufficient; DHCPv6 is not required.
Router Advertisements
In each of your LAN or user VLANs, create the following router advertisement configuration:
- Type: assisted
- Advertise Default Gateway: checked
Gateways
Verify that two gateways were created automatically at System > Gateways > Configuration: one for IPv4 and IPv6, respectively.
Outbound NAT
Navigate to Firewall > NAT > Outbound and select Automatic outbound NAT rule generation.
Conclusion
That’s it - you should now have a working OPNsense internet router with IPv4 as well as IPv6 connectivity. You can test the latter here or with a simple Google test.


Comments