Home Assistant Installation as VM on Proxmox
- Home Automation, Networking & Self-Hosting
- Published Dec 1, 2024 Updated Dec 14, 2024
This article explains how to set up Home Assistant in a virtual machine on Proxmox with automatic HTTPS via dockerized Caddy. This post is part of my series on home automation, networking & self-hosting that shows how to install, configure, and run a home server & network with dockerized or virtualized services.

How to Install Home Assistant on Proxmox
This article assumes that you already have a home server with Proxmox. See this earlier article for details on how I selected and installed mine.
Installation Method
There are four different ways to install Home Assistant. Only one of them, Home Assistant Operating System (HAOS), comes without limitations (source), making it the obvious choice.
HAOS is a Linux-based OS optimized to run Home Assistant and its add-ons. The latter run in separate Docker containers each. HAOS is available for single board computers like the Raspberry Pi but also supports regular (virtualized) x86 systems - which is what we’re using here.
Manual or Scripted?
As there are a number of steps involved in properly setting up a virtual machine for Home Assistant, the Proxmox community has created a script to simplify the task. We’ll make good use of it in this article.
Installation Instructions for Home Assistant on Proxmox
Community Script
The script recommends not to be run via SSH. Instead, access the Proxmox server’s console and run the following to download and execute the community script:
bash -c "$(wget -qLO - https://github.com/community-scripts/ProxmoxVE/raw/main/vm/haos-vm.sh)"
VM Configuration
When asked by the script, choose the following configuration options for your Home Assistant VM:
- This will create a New Home Assistant OS VM. Proceed?
Yes - Settings
Advanced - HAOS version
Stable - Virtual machine ID
Leave at default (100for the first VM) - Machine type
Q35
Reasoning: this is the more modern machine type. - Disk cache
Write through (default) - Hostname
ha1 - CPU model
Host (default) - CPU cores
2 - RAM
6144 - Bridge
vmbr0 - MAC address
Leave at default - VLAN
Leave at default (blank) - MTU size
Leave at default (blank) - Start VM when completed
Yes - Storage pools
zfs-data-encrypted
Reasoning: This is the encrypted ZFS pool we set up for our Docker and VM data.
Static IP Address
Assign a static IPv4 address via your DHCP server. Reboot the Home Assistant VM and inspect the VM’s console to check whether the assignment succeeded.
In this example, I’m assuming the VM’s IP address is 192.168.0.11.
Proxmox VM Start: Wait for Encrypted ZFS Volume Mount After Boot
A problem with encrypted ZFS volumes is that they need to be unlocked after each reboot. If you chose the secure option of requiring a passphrase, the encrypted ZFS volume won’t be mounted until after you SSH into the machine, run the zfs mount command, and type in the passphrase. If you have VMs on the encrypted volume, they’ll fail to start automatically.
We can solve this in the same way we solved it for Docker containers. I’m assuming you have the file /usr/local/bin/wait-for-unlock.sh already in place.
Create a unit file snippet for the PVE-Manager service:
systemctl edit pve-manager
Paste the following two lines in the editor window that opened and save the file:
[Service]
ExecStartPre=/usr/local/bin/wait-for-unlock.sh
Reboot the Proxmox server to verify that the mechanism works.
Initial Home Assistant Configuration
Access Home Assistant’s web UI in your browser at port 8123 and the IP address you assigned earlier. In this example the URL would be http://192.168.0.11:8123.
Click Create my smart home. Select a user name and password. Specify your home’s location.
File Editor Add-On
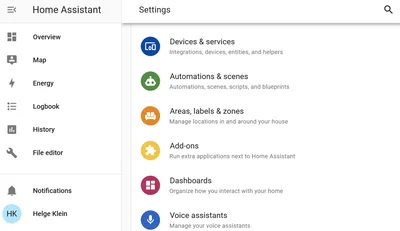
Navigate to Settings > Add-ons > Add-on store and install the File Editor add-on for easy access to Home Assistant’s config files.
HTTPS Certificate for Home Assistant via Caddy
We want to access Home Assistant via HTTPS, of course. We’ll use the Caddy reverse proxy which we already set up earlier in a Docker container to automatically handle the certificate management.
Caddy container-vars.env File
Add the following to container-vars.env:
VM_HA_IP=192.168.0.11 # Replace with your Home Assistant VM's IP address
Caddyfile
Add the following to Caddyfile (details):
ha.{$MY_DOMAIN} {
	reverse_proxy {$VM_HA_IP}:8123
	tls {
		dns cloudflare {env.CLOUDFLARE_API_TOKEN}
	}
}
DNS A Record
Add an A record to your DNS domain that points to Caddy (not to the Home Assistant VM!):
ha.home.yourdomain.com 192.168.0.4 # replace with your home server's IP address
Try to resolve the name on a machine in your network (e.g., nslookup ha.home.yourdomain.com).
Reload Caddy’s Configuration
Instruct Caddy to reload its configuration by running:
docker exec -w /etc/caddy caddy caddy reload
Allow Home Assistant to be Accessed via Reverse Proxy
Home Assistant doesn’t allow access via a reverse proxy by default. If you try to access https://ha.home.yourdomain.com at this point, you’ll only see the error message 400: Bad Request. We’ll change that by adding two directives to the configuration (docs).
Before we can do that, we need the IP address from which Caddy accesses Home Assistant. We can find it in HA’s log by navigating to Settings > System > Logs. You should find an entry similar to the following from your earlier attempt to access HA’s web UI via Caddy:
A request from a reverse proxy was received from 192.168.0.4, but your HTTP integration is not set-up for reverse proxies
To allow access via the Caddy reverse proxy, click File editor in the menu on the left and add the following to configuration.yaml:
http:
  use_x_forwarded_for: true
  trusted_proxies:
    - 192.168.0.4
Click the cog icon in the upper right corner and restart Home Assistant.
You should now be able to access the Home Assistant web interface at https://ha.home.yourdomain.com without getting a certificate warning from your browser.
Troubleshooting Tips
Shell Access to the Home Assistant VM
In the Proxmox UI, access the Home Assistant VM’s console. At the ha > prompt (Home Assistant’s CLI), type login to get a real shell.
Locate the Configuration File
Run the following to locate the config file:
find -iname configuration.yaml
In my case, this returned the path /mnt/data/supervisor/homeassistant/configuration.yaml.
Edit the Configuration File at the Console
Edit the config file with vi (the editor included in the HAOS VM):
vi /mnt/data/supervisor/homeassistant/configuration.yaml
Instruct vi to write the changes to disk and quit:
Esc:wqEnter


Comments