Hikvision Surveillance Network Camera Setup & Configuration
- Home Automation, Networking & Self-Hosting
- Published Apr 12, 2025 Updated May 24, 2025
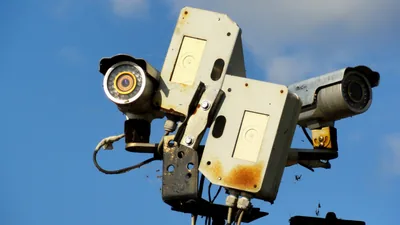
This is my documentation of how I set up and configured my Hikvision surveillance network camera. I bought a Hikvision camera because apparently their quality and reliability are good, which seems to be true. Their software, however, is rather gruesome.
But let’s get on with the camera’s configuration.
Setup
Default Network Configuration
The camera’s default network configuration is as follows:
- DHCP is disabled
- IP address:
192.168.1.4
Activation with SADP
The camera needs to be activated even before an IP address can be configured. I used Hikvision’s SADP tool to do the following:
- Locate the camera on the network
- Activate the camera
- Enable DHCP
- Set a password
Caveat: Same Subnet
Apparently, SADP locates cameras through broadcasts. It won’t work across routers/gateways/VLANs. This means that the PC you’re running SADP on and the camera need to be on the same IP subnet.
Caveat: Maximum Password Length
If you paste a long and secure password from your password manager, be warned that the password is truncated to the first 16 characters! Apparently that is the maximum password length supported by the camera.
Automatic HTTPS With Caddy (?)
At this point I’d normally describe how to secure access to the device by placing it behind a Caddy reverse proxy which provides automatic HTTPS and, optionally, authentication. Unfortunately, that scenario doesn’t work with Hikvision cameras, as their web UI seems to be a collection of bugs held together by duct tape. Moving that contraption behind a reverse proxy seems to be equivalent to putting the proverbial straw on the camel’s back.
For what it’s worth, here’s an article that describes how to make a Hikvision camera work behind an NGINX reverse proxy. If what the author describes still applies, I couldn’t replicate it with Caddy.
Firmware Update
Download the latest firmware version and update the firmware via the camera’s web interface by navigating to Maintenance and Security > Upgrade. Select the firmware file you downloaded and click Upgrade.
Initial Configuration
System Settings
Go to Configuration > System > System Settings > Time Settings and configure the time zone and time synchronization via NTP.
Enable ONVIF (Optional)
ONVIF is a vendor-neutral protocol to access the camera’s feed and, optionally, control it. Enable it as required.
Go to Configuration > Network > Platform Access > ONVIF and enable. Set the Authentication Mode to Digest&ws-username token. Add a user of type operator and specify a password.
ONVIF Client for Windows
To view the camera’s video feed, download IP Centcom.
Enable RTSP (Optional)
RTSP is a popular protocol for accessing a camera’s video feeds. It’s used by NVRs (network video recorders) such as Frigate. Enable RTSP as required.
Go to Configuration > Network > Network Service > RTSP > Main Stream and set the Authentication Mode to digest/basic and the Digest Algorithm to MD5. Repeat the above for the Sub-Stream.
Go to Configuration > System > User Management and create a new user for accessing the RTSP streams:
- User Type:
User - Permission Configuration:
Remote / Log Search+Remote: Live View+Remote: Playback/Download.
See the documentation (How do I get my RTSP stream?) for the RTSP URLs that provide access to the camera’s feeds.
Video Codec
Go to Configuration > Video/Audio > Video > Main Stream, switch Video Encoding to H.264 and disable H.264+ (the latter being a proprietary extension by Hikvision whereas we’re aiming for broad compatibility). Repeat the above for the Sub-Stream.
Privacy Mask
If necessary, mask out regions of the camera picture.
- Go to Configuration > Image > Privacy Mask.
- Enable the setting.
- Draw an area on the camera picture.
- Click Add and then Save.
SD Card (Local Storage)
Formatting
If you inserted an SD card, go to Configuration > Storage > Storage Management > HDD Management, select the SD card and click Format.
Motion Detection
Enable motion detection at Configuration > Event > Event and Detection > Motion Detection as follows:
- Enable: checked
- Enable Dynamic Analysis for Motion: (check if you want a green grid displayed that highlights the trigger object in the footage)
- Linkage Method: check Upload to FTP/Memory Card/NAS
- Recording Linkage: check next to
A1
Recording
To enable recording to the SD card, I configured the following at Configuration > Storage > Schedule Settings > Record Schedule:
- Enable: checked
- Record Schedule:
- Motion Detection: checked
- Schedule: all days/hours selected
- Recording Parameters:
- Overwrite: checked
- Stream Type: Main Stream
- Pre-Record: 10 sec
- Record Delay: 10 sec (this is called Post-Record in the manual)
Network Video Recorder (NVR)
A surveillance camera just by itself is not enough for most use cases. You need a device that stores all recordings independent of the camera (where it could easily be destroyed) and, ideally, cleverly detects motion in such a way that irrelevant scenes (probably making up 99.9% of all frames) are discarded. This device should also make the recordings easily available through a comfortable web UI (that works behind a reverse proxy).
Such a device is called a network video recorder (NVR) and Frigate is an excellent open-source NVR specimen. Frigate runs well on a Raspberry Pi 5 with a Google Coral TPU for motion detection. See this article for a detailed guide on how to set up and configure the Frigate NVR.



Comments