Creating Custom Home Assistant Dashboards in YAML Mode
- Home Automation, Networking & Self-Hosting
- Published Jul 5, 2025 Updated Jul 21, 2025
This is a getting started guide with information I wish I’d had when I made my first forays into creating custom dashboards for Home Assistant.

Preparation
SMB Access to Home Assistant Configuration
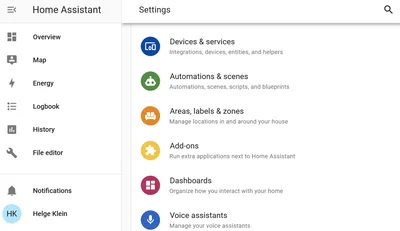
Set up SMB access to the Home Assistant file system by navigating to Add-on Store and installing the Samba share add-on (docs). Configure it as follows:
- Username & password: specify credentials for accessing HA’s SMB shares.
- Enable Compatibility Mode: disable! Legacy Samba protocols are a security risk and absolutely unnecessary.
- Veto Files: clear the list of files that are not accessible via SMB.
Map the config share on your Windows PC as described here.
How to Edit: UI or YAML?
Home Assistant dashboards can be edited in one of two modes: from the UI or via YAML files. Initially, UI mode may seem easier and more intuitive but once you dig in you’ll want the control and efficiency offered by YAML mode.
Storage Locations
UI Mode Dashboards
UI mode dashboards are stored in the folder config/.storage in files whose names start with lovelace. Editing these directly is discouraged. Instead, you can inspect and change the dashboard definitions in the UI’s Raw configuration editor.
YAML Mode Dashboards
YAML mode dashboards are stored in the config folder or a subfolder. To make Home Assistant aware of your custom dashboard files, add a corresponding section to the main config file configuration.yaml which you’ll find in the root of the config file share we mapped above (docs, example below).
Inspecting the Config Mode of Existing Dashboards
In the UI, navigate to Dashboards for a list of the existing dashboards. The Configuration method column lists each dashboards mode as either UI controlled or YAML file.
Adding a Custom YAML Dashboard to the Configuration
To add your custom dashboard file to the configuration, open configuration.yaml in your favorite editor.
Config: Keep Existing Dashboards in UI Mode
If it doesn’t contain a top-level key lovelace: yet, add the following to ensure the existing dashboards stay in UI mode:
lovelace:
  mode: storage
Config: Add a YAML Mode Dashboard
To configure your a dashboard, add a section like the following to the top-level key lovelace:
  # YAML dashboards
  dashboards:
    dashboard-name:
      mode: yaml
      title: Dashboard Title for the Sidebar
      icon: mdi:script
      show_in_sidebar: true
      filename: dashboards/dashboard-name.yaml
Notes:
- YAML key (
dashboard-name:in the example above): The name can be freely chosen but it must contain a hyphen (-). - Icon: You can use any Material Design Icon (MDI).
- Filename: I recommend to use the same as the YAML key (see above). The
dashboardssubfolder is not strictly necessary but it helps keeping your files organized.
Migrating Dashboard Content From UI to YAML
Sometimes it’s easier to start working on a dashboard in UI mode. When you want to get serious and switch to YAML mode you can easily transfer your work over. This involves just two steps:
- Add your new YAML mode dashboard to the configuration (see above).
- Create a YAML file and copy the contents over from UI mode (see below).
Copying Dashboard Contents From UI Mode to YAML
In the HA UI, open the dashboard whose contents you want to migrate. Click the pencil icon (“edit dashboard”) in the upper-right corner. Click the three dots in the upper-right corner and select Raw configuration editor. Press Ctrl + a followed by Ctrl + c to select and copy the entire contents of the dashboard definition.
On your PC, navigate to the Home Assistant SMB share config (e.g., \\ha.home.yourdomain.com\config). Create the subfolder dashboards if you wish to use it for storing your dashboards. Create and open a file dashboards/dashboard-name.yaml in your editor. Paste the contents you copied from the HA UI earlier.
Restart to Apply Your Changes
Although the documentation mentions a reload functionality I couldn’t find it. As a somewhat slower alternative I restarted Home Assistant to apply the changes above.
Dashboard Content: Cards
Home Assistant dashboard are comprised of individual units called cards.
Templates: Scripting and Logic
The one thing I’m missing most is a generic ability to use scripting and logic functions right in the dashboard YAML code. That would make it possible to create much more advanced dashboards and avoid unnecessary code repetitions. Unfortunately, that functionality is not available.
Home Assistant does have a templating feature powered by the Jinja2 engine. However, templates can only be used in select few places and are not supported by most cards.
Markdown Card
The Markdown card is a versatile card that not only displays Markdown-formatted text but also icons and alerts. Most notably, the Markdown card is one of the very few that supports templates.
Entities Card
The entities card displays the status of multiple entities in a compact format with icon (choose a meaningful icon in the entity’s definition), description, and value. Clicking on an entity opens a dialog with details.
Read-Only Entity Display
If you want to disable the ability to bring up the details dialog and display the entity as read-only, add the following to the entity card:
type: simple-entity
tap_action: none
hold_action: none
Conditional Card
Use the conditional card to only display a card if certain conditions are met as shown in the following example:
- type: conditional
  conditions:
    - condition: state
      entity: switch.comfoclime_36_comfort_temperature_automatic
      state: "off"
  card:
    type: entities
    entities:
      - entity: number.comfoclime_36_manual_comfort_temperature
        name: Manual Temperature
Debugging
Unfortunately, Home Assistant is not very helpful in case of errors. When there’s a problem, HA displays a generic error message in the UI. It’s up to you to figure out what caused it (hint: often a formatting issue in your YAML code).
Syntax Checking and Auto-Formatting
Install Red Hat’s YAML extension for VS Code to get real-time syntax error checking.
Auto-format a YAML file by pressing Shift + Alt + f in VS Code.


Comments