Windows Server 2019 on Hetzner's EX62 & AX100 Dedicated Servers
- Virtualization & Containers
- Published Apr 8, 2019 Updated Apr 15, 2019
This post is a follow-up to my 2016 article on how to install Windows Server on Hetzner’s EX51 hosted dedicated servers.
Hetzner offers many types of dedicated servers at very attractive prices and - astonishingly - good support. This article lists some issues we encountered while installing Windows Server 2019 on the EX62 and AX100 servers and how we worked around them. Reading the earlier article is highly recommended.
Server Hardware
Most of Hetzner’s servers are custom builds based on regular PC mainboards. You can get “real” servers, too (they have several Dell offerings), but at a much higher price. I can relate from many years of personal experience that Hetzner’s “non-server” machines are very reliable.
EX62 - Intel
The EX62 is a powerful Intel machine, available for €82/month (traffic included). Specs:
- Intel Core i9-9700K, 8 cores
- Cinebench R15 single core: 219
- Cinebench R15 multi core: 2081
- 64 GB RAM
- 2 x SSD NVMe 1 TB
 by Marcin Wichary under [CC](https://creativecommons.org/licenses/by/2.0/)")
AX100 - AMD
The AX100 is a powerful AMD machine, available for €130/month (traffic included). Specs:
- AMD Ryzen Threadripper 2950X, 16 cores
- Cinebench R15 single core: 180
- Cinebench R15 multi core: 3187
- 128 GB RAM
- SSDs (priced extra):
- 1 x SSD NVMe 1.92 TB datacenter edition: €58
Mainboards
In order to look for drivers or compatibility information, you need to know a server’s mainboard. Unfortunately, Hetzner does not publish the mainboard types they use for their custom builds. To make planning easier for others here are the boards we saw in our machines:
- EX62: Gigabyte B360HD3PLM-CF (U3E1)
- AX100: MSI X399 HZ (SP3r2)
Installing Windows Server 2019
Booting from the Setup ISO
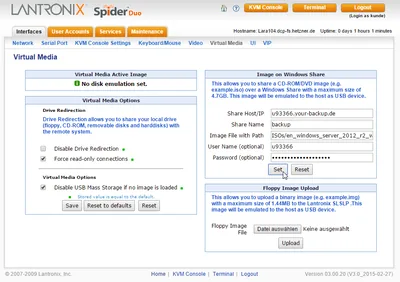
In order to be able to install your own OS, you need to ask Hetzner Support to connect a remote KVM console called LARA. I have described the process in detail in my earlier article.
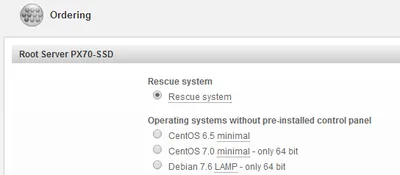
You have two options to boot from the Windows setup ISO image:
- Copy the ISO file from another Hetzner machine to a Hetzner backup space or storage box and mount it from the LARA console
- Ask Hetzner support to copy your ISO to a bootable USB thumb drive and attach said drive to your server
Let me make this quick: the second variant works much better. Mounting ISOs from the LARA console results in extremely slow setup procedures that may run into timeouts after several hours.
Installing Missing Drivers
EX62
Windows Server 2019 does not come with drivers for the mainboard’s NIC, an Intel I-219. Install the Windows 10 drivers from Gigabyte for both the NIC and the Intel chipset.
AX100
Install the chipset driver from MSI.
Once that is done, there remain three unknown devices in Device Manager. For each of those, opt to install a driver manually and point the OS wizard to the extracted chipset driver you downloaded in the previous step.
The Intel I211 NIC requires more work. The Gigabyte driver cannot be installed because it is blocked on server versions of Windows. Nevertheless, download and extract it. Then proceed as follows:
- In Device Manager, right-click the NIC and select Properties
- Click the Driver tab, then Update Driver, then Browse my computer for driver software
- Click Let me pick from a list of available drivers on my computer
- Click Have disk
- Browse to the following subfolder of the extracted files: PROWinx64\PRO1000\Winx64\NDIS65
- Select e1r65x64.inf and click open
- This brings up a list of NIC types. Select I210
The only downside we found to this little trickery is that the I211 NIC shows up as an I210.


Comments