Samba & SMB Web Access Through Filestash With Passthrough Auth
- Home Automation, Networking & Self-Hosting
- Published Aug 16, 2025 Updated May 20, 2026
This article explains how to set up Filestash in a Docker container as a web interface for browser-based access to a Samba or SMB file server.
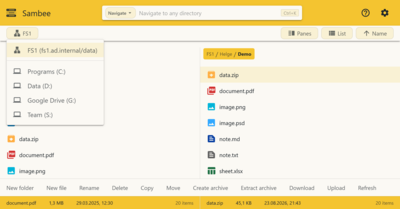
Please note that in my own use this configuration has been superseded by Sambee, my very own browser-based file viewer and manager. Sambee has a more polished and user-friendly UI, is optimized for desktop and mobile, displays Markdown not as code but rendered, has powerful search and navigation capabilities, keyboard shortcuts, and much more.
This article is part of a mini-series about running Samba Active Directory and a file server service in a Docker container on a home server:
- Samba Active Directory in a Docker Container: Installation Guide
- Samba Active Directory as Authelia’s Authentication Backend
- Samba File Server With Windows ACLs in a Docker Container
- Samba File Server With POSIX ACLs in a Docker Container
- Web Access Through Filebrowser With SSO & HTTPS
- Web Access Through Filestash With Passthrough Auth (this article)
- Web Access Through Sambee With Automatic HTTPS
- Auditing Samba File & Directory Changes With Elasticsearch
- GitHub repository with Docker files and helper scripts

Filestash Installation
Preparation
I’m assuming that you’ve set up Docker, the Caddy container and a Samba file server as described in previous articles.
Dockerized Filestash Directory Structure
This is what the directory structure will look like when we’re done:
rpool/
 └── encrypted/
     └── docker/
         └── filestash/
             ├── data/
             ├── container-vars.env
			 └── docker-compose.yml
We’re placing the configuration on the encrypted ZFS dataset (rpool/encrypted).
Create the new directories and set ownership of the directories to user/group ID 1000, which are used by the dockerized application:
mkdir -p /rpool/encrypted/docker/filestash/data
chown -Rfv 1000:1000 /rpool/encrypted/docker/filestash/data
Filestash Docker Compose File
Create docker-compose.yml with the following content:
services:

  filestash:
    container_name: filestash
    hostname: filestash
    image: machines/filestash:latest
    restart: unless-stopped
    networks:
      caddy_caddynet:
    expose:
      - 8334                                      # Web UI
    env_file:
      - container-vars.env
    volumes:
      - /etc/localtime:/etc/localtime:ro
      - ./data:/app/data/state

networks:
  caddy_caddynet:
    external: true
Environment Variable File container-vars.env
Create the file container-vars.env with the following content:
# External FQDN without http(s)://
# See https://github.com/mickael-kerjean/filestash/issues/828
APPLICATION_URL=files.home.yourdomain.com    # replace with your domain
Start the Filestash Container
Navigate into the directory with docker-compose.yml and run:
docker compose up -d
Inspect the container logs for errors with the command docker compose logs --tail 30 --timestamps.
Let’s Encrypt Certificate for Filestash via Caddy
Caddyfile
Add the following to Caddyfile (details):
files.{$MY_DOMAIN} {
	reverse_proxy filestash:8334 {
	}
	tls {
		dns cloudflare {env.CLOUDFLARE_API_TOKEN}
	}
}
DNS A Record
Add the following A record to your DNS domain:
files.home.yourdomain.com 192.168.0.4 # replace with your Docker host's IP address
Try to resolve the name on a machine in your network (e.g., nslookup files.home.yourdomain.com).
Reload Caddy’s Configuration
Instruct Caddy to reload its configuration by running:
docker exec -w /etc/caddy caddy caddy reload
You should now be able to access the Filestash web interface at https://files.home.yourdomain.com without getting a certificate warning from your browser.
Initial Filestash Configuration
Open the web UI in your browser and set your admin password. You should see a message telling you that SSL is configured properly. You’re now on the admin page at https://files.home.yourdomain.com/admin/backend.
Select Settings and disable the following:
- API
- Share
- Chromecast
- Video transcoder
Select Logs and disable the logging functionality (there might be a bug causing the log to grow indefinitely).
Configure Samba File Share as Backend
Select Backend > Storage Backend > Samba, select Authentication middleware > Passthrough and configure the following:
- Passthrough strategy:
username_and_password - Attribute mapping:
- Hostname:
fs1.ad.internal(hostname of your Samba file server) - Username:
{{ .user }} - Password:
{{ .password }} - Path:
/Data(repeat your share name here) - Port:
445 - Domain:
AD(your Active Directory domain name) - Share name:
Data(or your alternative share name)
- Hostname:
Test Samba File Access
Open the user UI URL https://files.home.yourdomain.com. You should see a simple username/password text input fields. Enter your Samba file share credentials and click connect. You’re now accessing your SMB file share via your browser. Uploading, downloading, and editing should all work, in addition to preview in the browser, of course.



Comments