Fast & Silent 5 Watt PC: Lenovo ThinkCentre M90t Modding
- Hardware
- Published Jan 31, 2026
This micro-series explains how to turn the Lenovo ThinkCentre M90t Gen 6 into a smart workstation that consumes only 5 Watts when idle but reaches top Cinebench scores while staying almost imperceptibly silent. In this first post, I’m showing how to silence the machine by replacing and adding to Lenovo’s CPU cooler. In a second post, I’m listing the exact configuration that achieves the lofty goal of combining minimal idle power consumption with top Cinebench scores.
Why the ThinkCentre M90t?
In recent years, the idle power consumption of Intel/AMD CPU platforms increased while the single-thread performance didn’t improve all that much - an unfortunate combination that had me wait for better times. After eight years, however, with a bit of chance and persistence, I found what I was looking for in Intel’s Core Ultra 9 laptop line of CPUs. With the Core Ultra 9 285 (no “K” after the model number) we get one of the fastest CPUs in terms of single-thread performance (albeit beaten more than easily by Apple’s M5) that nevertheless has the super-low idle power characteristics of a mobile device.
I’m not aware of any mainboards for the Core Ultra 9 285 that an enthusiast could use to build their own PC. After a bit of digging I found that the CPU is sold in certain models of Lenovo’s ThinkCentre line of business PCs. The fact that they truly have a little gem at their hands is more than well hidden both by Lenovo and Intel.
I bought the ThinkCentre M90t without having read a single test or review - there are none. My hunch turned out to be right, though. Built on a laptop platform, the power draw is indeed very low while the speed is as excellent as it should be (more on that in the next post).
Why Modding? Silence!
Unfortunately, Lenovo wastes an opportunity by using a cheap low-rate CPU cooler whose fan emits an unwelcome whirring noise even when the machine is idle. Luckily, the device mostly uses standard PC components so it’s (fairly) easy to rectify that.
Replacing the CPU Cooler
Replacement Cooler: Noctua NH-L9x65
I selected the Noctua NH-L9x65 as a replacement, a low-profile cooler from a company renowned for its build quality and low-noise designs. With a height of 65 mm the Noctua easily fits into the ThinkCentre (with lots of headroom to spare).
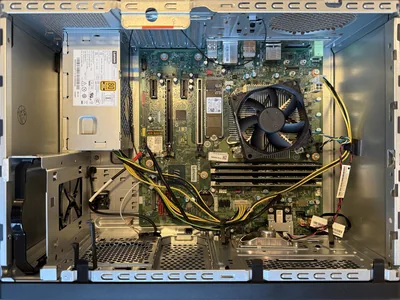
Step 1: Open It Up
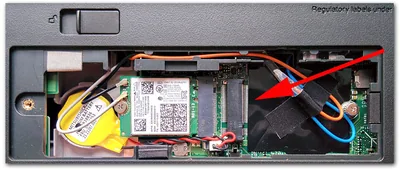
Having removed a kind of stabiliser bar and the disk case (both of which I didn’t bother to put back in), we get a good look at the innards:
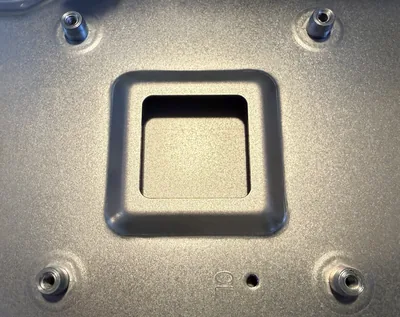
Step 2: Remove the Mainboard
Even though Lenovo’s primitive cooler can be removed by loosening the four screws you see in the image above, any decent cooler needs a backplate on the underside of the mainboard which, unfortunately, requires us to remove the mainboard.
Once you’ve done that you’ll notice something non-standard:
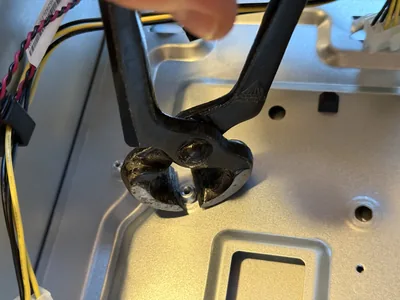
Step 3: Remove the Standoffs
The four standoffs around the CPU prevent the mounting of the Noctua cooler’s backplate. Let’s remove them with pincers (be bold, it works well):
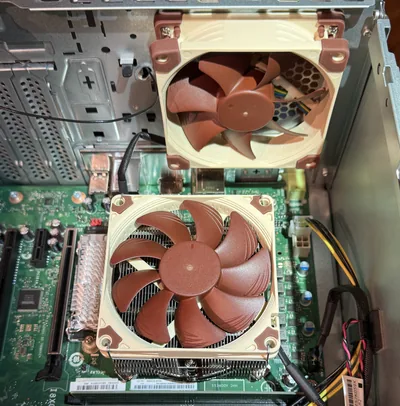
Step 4: Mount the Noctua Cooler
With the standoffs out of the way, the Noctua cooler can be mounted as per instructions. This is what my result looks like:

Mounting a Rear Exhaust Fan
Somewhat counterintuitively, adding a fan can reduce noise. This is when the build lacks a means to transport heat out of the case. To be quite honest, I consider this an unforgivable mistake on the part of Lenovo. Moving hot air around in the (nicely) small case benefits no one - the heat has to get out.
To that end I mounted a Noctua NF-A9 PWM (92 mm, 12 V) and connected it to the SYS_FAN outlet on the mainboard. The result looks like this:
Mainboard Replacement
In case you ever need this, Lenovo has an excellent spare parts shop where you can order almost (?) any replacement you might need. The following information should be helpful if you ever have to replace your Lenovo mainboard.
Machine Type and Serial Number Invalid
After replacing the mainboard, when the computer is powered on it beeps twice and shows the message: machine type and serial number invalid.
Fix: Download and run the BIOS update tool (Lenovo Firmware Update Utility, wFlashGUIx64.exe).
- It asks whether you want to update the serial number and the machine type.
- Select yes and enter:
- Serial number: from the sticker on the device.
- Machine type and model: displayed at pcsupport.lenovo.com once you enter your serial number.


Comments